
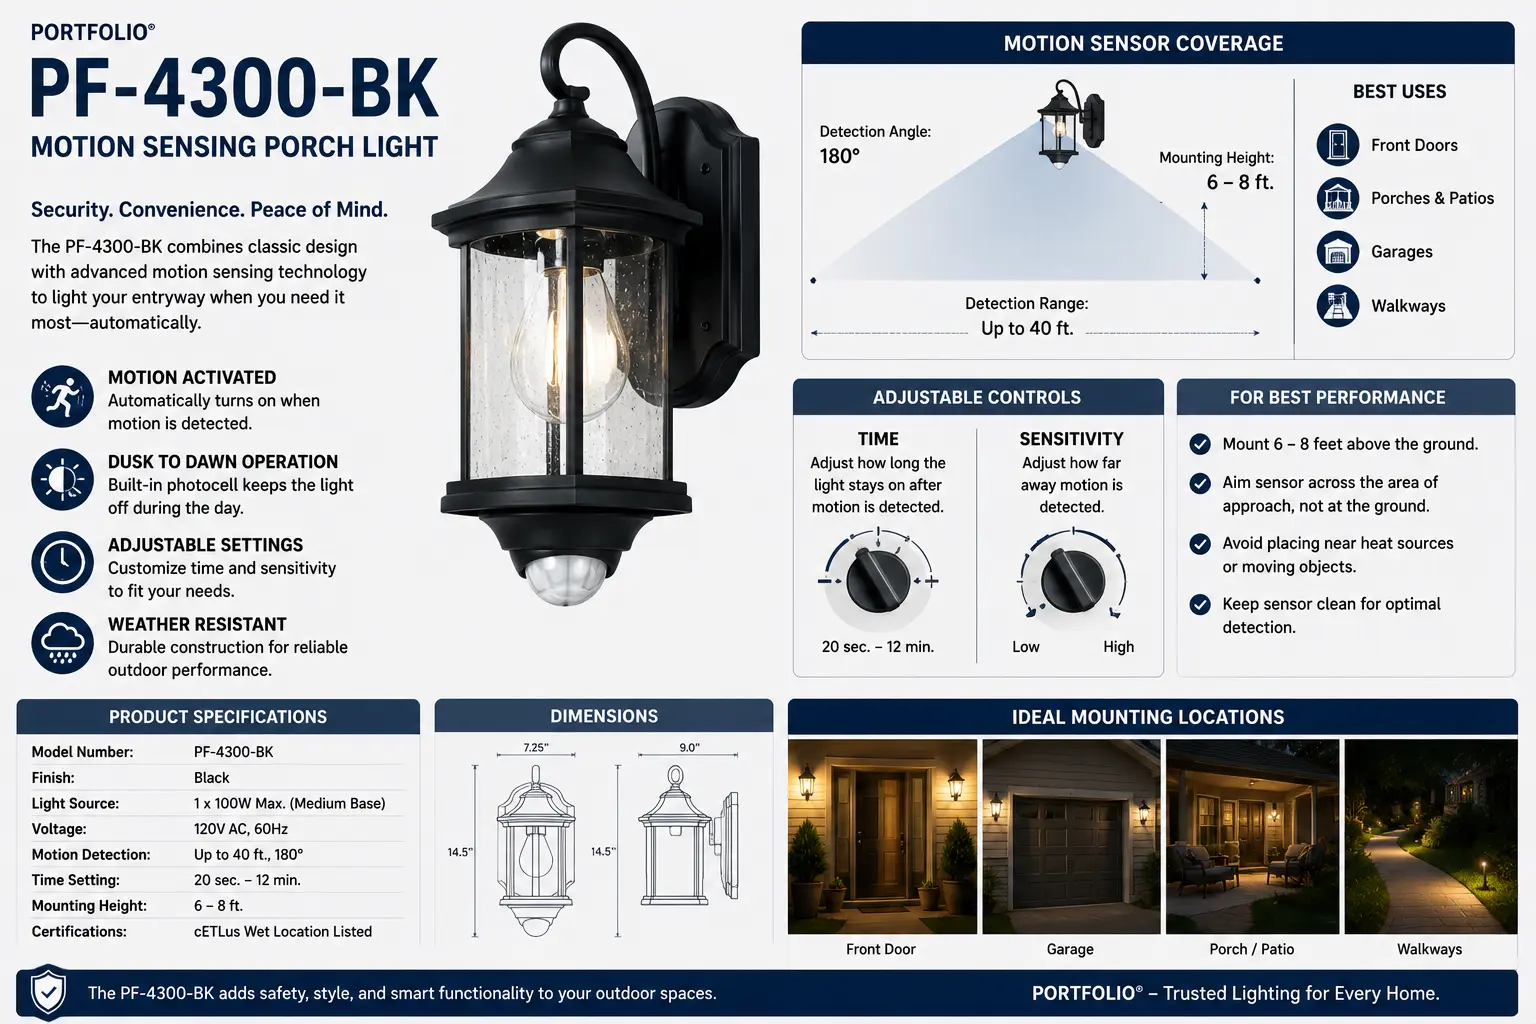
Identification: Model Number, Item Number & Manufacturer
Before ordering any parts or replacement bulbs, confirm you have the correct fixture. The PF-4300-BK has two different identification numbers that appear in different places on the packaging and documentation.
- Model Number: PF-4300-BK — appears on the fixture label inside the canopy, on the original packaging, and throughout the owner's manual. The "BK" suffix indicates the Black color finish.
- Item/Article Number: 022246 — the Lowe's retail item number. This is the number used on the Lowe's shelf tag, in Lowe's lookup systems, and on the UPC barcode. Both numbers reference the same product.
- Manufacturer: HeathCo LLC. Although sold under the Portfolio brand at Lowe's, the PF-4300-BK was manufactured by HeathCo LLC, the same company that makes Heath Zenith motion-sensing lights. The owner's manual copyright reads "© 2007 HeathCo LLC." The identical fixture was sold under the Heath Zenith brand as the SL-4300 series in other retail channels. The technical service number on the manual (1-800-858-8501) reached HeathCo's service department, not Lowe's, and is no longer operational for Portfolio warranty claims on this discontinued product.
- Also known as: DualBrite PF-4300-BK — the manual lists this as an alternate name on the cover page, distinguishing the DualBrite-equipped version from earlier non-DualBrite motion lights in the same series.
- Manual document number: 598-1169-05 — appears in the footer of the original owner's manual pages, useful if you locate a paper manual and need to confirm it matches this model.
Complete Confirmed Specifications — From the Official Owner's Manual
All specifications below are drawn directly from the PF-4300-BK owner's manual (ManualsLib document 67284). These are confirmed values, not estimates.
| Specification | Confirmed Value | Notes |
|---|---|---|
| Detection Range | Up to 30 ft (9.1 m) | Varies with surrounding temperature — warmer ambient = shorter effective range (see sensor section) |
| Sensing Angle | 360° | Full-perimeter PIR coverage; less sensitive directly toward sensor, most sensitive to crossing motion |
| Fixture Electrical Load | Up to 100W Maximum Tungsten Incandescent | Total across both lamp holders; 25W max per individual socket |
| Bulb Type | Candelabra Base, Type "B", 25W Maximum | E12 screw base; Type B = bullet/flame-tip shape |
| Sensor Capacity | Up to 200W (1.7A) Maximum Tungsten | Sensor can control additional 100W beyond the fixture's own 100W load |
| Power Requirements | 120 VAC, 60 Hz | Standard North American household current; NOT compatible with low-voltage landscape systems |
| Operating Modes | TEST, AUTO, and MANUAL MODE | Plus ACCENT (DualBrite) — 4 effective modes total |
| ON-Timer Settings | TEST, 1, 5, 10 minutes | Duration light stays on after motion detection; TEST = ~5 seconds |
| DualBrite Timer | Off, 3 hours, 6 hours, dusk-to-dawn | Separate switch from ON-TIME; controls accent (half-power) operation duration |
| Housing Material | Diecast | Die-cast metal construction; weather-rated for outdoor use |
| Color Finish | Black (BK) | PF-4300-BK suffix indicates black finish |
| ENERGY STAR | Meets guidelines when DualBrite off | DualBrite continuous half-power draw disqualifies ENERGY STAR when active |
| Warranty | 3-Year Limited Warranty | HeathCo LLC; covers factory defective parts and workmanship |
| Installation Time | ~30 minutes (estimated) | Per manual; includes universal mounting bracket installation |
| Minimum Mount Height | 8 feet (2.4 m) above ground | "For best performance" per official manual |
| Manufacturer | HeathCo LLC | © 2007 HeathCo LLC; service: 1-800-858-8501 (discontinued) |
Package Contents
The official manual lists these items as included in the PF-4300-BK box. If you're sourcing a used or incomplete unit, verify all of these are present before installation:
- 1Porch Light — the diecast fixture body with sensor module, DualBrite switch, and ON-TIME switch
- 2Universal Mounting Bracket — "Easy to use" per manual; accommodates various junction box configurations
- 3Mounting Hardware — screws and hardware for bracket attachment; specific sizes not listed in manual
- 4Wire Nuts — for connecting fixture wires to junction box wires; standard twist-on connectors
- 5Lens Shield — installs over the PIR sensor lens to narrow the field of view and reduce false triggers from heat sources; may also be described as a "blinder" accessory
Not included, required for installation: Phillips and flathead screwdrivers; pliers; wire strippers/cutters; safety glasses; light bulb (Type B candelabra, 25W max per socket); silicone caulk (for weatherproofing the bracket-to-wall junction).
The Four Operating Modes
The PF-4300-BK has four distinct operating states controlled by two physical switches on the sensor head: the ON-TIME switch (TEST / 1 / 5 / 10 MIN) and the DualBrite switch (Off / 3H / 6H / D). Understanding what each mode does — and when the photocell overrides them — prevents most of the "my light won't work" calls.
The setup and verification mode. When ON-TIME is at TEST, the light stays on for approximately 5 seconds after each motion detection event instead of the full 1/5/10 minutes. This lets you walk through the coverage area quickly during installation without waiting for full on-times to expire.
- Useful during initial installation to verify detection coverage
- Also useful when aiming the sensor after lens shield installation
- Works day and night (photocell does not suppress TEST mode activation during the day in some firmware versions — verify with your unit)
- After setup, move ON-TIME to 1, 5, or 10 minutes before leaving fixture in regular service
The standard operating mode. The photocell keeps the fixture off during daylight hours. At dusk, the sensor activates automatically. When motion is detected, the light turns on at full power and stays on for the duration set on the ON-TIME switch (1, 5, or 10 minutes). Then it turns off and waits for the next motion event.
- Photocell prevents any operation during daylight — light cannot be triggered during the day in AUTO
- Default mode after any power interruption or reset
- Combine with DualBrite switch for accent lighting between motion events
- Power off for one full minute to reset to AUTO from any other mode
Forces the light to stay on at full power for the duration set on the ON-TIME switch, without waiting for motion. Useful when you want continuous porch light for an extended entry period (hosting guests, carrying groceries) without the light cycling off between motion detections.
- Activated by flipping wall switch OFF for one second then back ON
- Only works at night — photocell returns sensor to AUTO at dawn regardless of MANUAL state
- Only works when ON-TIME is at 1, 5, or 10 minutes (not TEST, not TO DAWN)
- To exit: flip wall switch off, wait one minute, back on — returns to AUTO
The DualBrite feature runs the fixture at half power as ambient accent lighting, then switches to full power when motion is detected. The DualBrite switch sets how long the half-power accent period runs: 3 hours after dusk, 6 hours after dusk, or continuously dusk-to-dawn.
- DualBrite Off = pure motion-only operation; ENERGY STAR compliant
- 3H = half power for 3 hrs after dusk, then off until motion detected
- 6H = half power for 6 hrs after dusk, then off until motion detected
- D = half power dusk-to-dawn; full power on motion all night
- ENERGY STAR compliance requires DualBrite set to Off
DualBrite: How the Accent Lighting Feature Works
DualBrite is a HeathCo-patented feature that gives the PF-4300-BK a two-level lighting capability — ambient half-power operation as a welcoming porch light, plus full-power response when motion triggers it.
The DualBrite Switch Settings
The DualBrite switch is separate from the ON-TIME switch and has four positions:
- Off: DualBrite disabled. The fixture operates purely as a motion-activated light — off at all times until motion is detected, then full-power for the ON-TIME duration. This is the ENERGY STAR configuration.
- 3H: After dusk, the fixture runs at approximately half its rated wattage for 3 hours, then turns off. During this 3-hour accent window, any detected motion triggers full-power operation for the ON-TIME duration, then returns to half-power for the remainder of the 3-hour window. After 3 hours, only motion triggers the light.
- 6H: Same as 3H but the accent period extends to 6 hours after dusk.
- D (Dusk-to-Dawn): The fixture runs at half power from dusk until dawn, every night. Motion events during this period trigger full-power response for the ON-TIME duration, then return to half power. This creates a continuously-lit porch appearance with a security-response boost when activity is detected.
ENERGY STAR and DualBrite
The official manual states the PF-4300-BK "Meets the ENERGY STAR guidelines when DualBrite function is off." When DualBrite is active in any of the 3H, 6H, or D settings, the fixture draws continuous half-power load during the accent period — which doesn't qualify as the on/off motion-controlled operation that ENERGY STAR requires for lighting fixtures in this category. If ENERGY STAR compliance matters for a rebate program or utility incentive, set the DualBrite switch to Off.
Half Power Defined
The "half power" accent mode operates the lamp at reduced voltage, producing approximately half the light output compared to full-power operation. With two 25W incandescent candelabra bulbs at full power (50W total), DualBrite accent mode runs them at roughly 25W equivalent output — noticeably dimmer than full activation but sufficient for ambient porch presence lighting. With LED replacements at 4–5W each, the half-power accent output is very low-wattage — though some LED drivers don't dim gracefully at half-voltage; see the LED retrofit section for guidance on this compatibility consideration.
Mode Switching: The One-Second Toggle and Reset Procedure
The Mode Switching Summary (from the Official Manual)
| To Enter This Mode | Action Required | Works At | ON-TIME Requirement |
|---|---|---|---|
| TEST Mode | Move ON-TIME switch to TEST position | Day & Night | Switch at TEST |
| AUTO Mode | Normal state — or power off 1 min then back on | Night only (photocell) | 1, 5, or 10 min |
| MANUAL Mode | Flip wall switch OFF for 1 second, then back ON | Night only (photocell) | 1, 5, or 10 min only |
| ACCENT Mode | Set DualBrite switch to 3H, 6H, or D | Night only (photocell) | Any setting |
The Universal Reset
The official manual provides a single procedure that fixes most mode-confusion situations: "If you get confused while switching modes, turn the power off for one minute, then back on. After the calibration time the control will be in the AUTO mode." This works regardless of which mode the fixture is in. Turning off the wall switch for one full minute fully discharges the control circuit, and the 1½-minute startup calibration period returns everything to the default AUTO state.
The Calibration Wait Period
After any power restoration — whether from the breaker, a wall switch, or after the one-minute reset procedure — the fixture requires approximately 1½ minutes of calibration time before the sensor operates normally. During this calibration window, the sensor may appear to not work at all, or may trigger in an unexpected pattern. This is normal circuitry behavior, not a malfunction. Set a timer and wait the full 90 seconds before evaluating sensor function after any power-on event.
Installation: Universal Mounting Bracket Step-by-Step
The PF-4300-BK uses a universal mounting bracket that accommodates a range of standard junction box configurations. Estimated installation time per the official manual is 30 minutes.
Wiring Configurations: Single Fixture, Independent Pair, and Dual Master
The PF-4300-BK supports three wiring configurations beyond the basic single-fixture installation. The dual-master configuration in particular is useful for large entry areas or long driveways.
Single Motion Sensing Light
The standard configuration: black to black, white to white, ground to ground at the junction box. The fixture controls only its own lamp load. The sensor activates the fixture's own bulbs.
Two Motion Sensing Lights — Working Independently
Each fixture controls only its own bulbs, but both are wired to the same circuit. Motion at fixture A triggers only fixture A's lights; motion at fixture B triggers only fixture B's lights. Wiring diagram: each fixture connects black-to-black, white-to-white, ground-to-ground at its own junction box, both fed from the same circuit. This is the straightforward "two porch lights on the same switch circuit" installation.
Dual Master System (Advanced)
The most capable configuration: either fixture detecting motion triggers both fixtures simultaneously. The manual states: "It is also possible to wire two motion sensing lights so that either fixture will turn on both lights at the same time (dual master system)." This is useful for: large entryways where coverage from one sensor position is insufficient; long driveways where a motion event at the bottom triggers light at the top of the driveway simultaneously; front/back porch configurations where motion at either entrance activates all exterior lighting.
Controlling Additional Fixtures from the Sensor
The PF-4300-BK's sensor is rated for up to 200W (1.7A) maximum tungsten — significantly more than the 100W maximum fixture load. The manual notes: "This fixture is provided with a sensor rated for 200 Watts. Since the fixture is only rated 100 Watts, 100 Watts of additional lighting may be controlled by this sensor." This means the sensor circuit can switch an additional 100W of external fixture load (a second standard or motion-sensing porch light, or a flood lamp in the same junction box circuit). When calculating total sensor load: add the fixture's own maximum bulb wattage to any additional controlled fixtures; stay within the 200W sensor maximum.
Sensor Coverage Adjustment, Directional Sensitivity & Seasonal Calibration
PIR (passive infrared) motion sensors on porch lights are more complex than most homeowners realize. Three separate adjustments affect detection behavior, and seasonal temperature changes require periodic recalibration of at least one of them.
The SENS (Sensitivity) Dial
The sensitivity dial adjusts how strong a heat differential the sensor requires to trigger. Set toward MAX, the sensor triggers on smaller heat differentials — catching more distant and slower-moving targets but also more prone to false triggers from passing vehicles, pets, HVAC equipment, or wind-blown sun-heated surfaces. Set toward MIN, the sensor requires a stronger heat contrast to trigger — more resistant to false triggers but also less sensitive to distant or slow movement.
Directional Sensitivity Bias: A Critical Point Many Owners Miss
The sensor is not equally sensitive in all directions within its 360° range. The manual states explicitly: "The sensor is less sensitive to motion directly towards it and more sensitive to motion across coverage area." This means a person walking directly toward the sensor — approaching the porch head-on from the street — may not trigger the light at the full 30-foot range. A person walking across the sensor's field of view — moving parallel to the house front — will trigger it at greater range. This is physics, not a defect. To compensate: aim the sensor so that the path of approach is a crossing path rather than a head-on approach. If the porch faces directly toward the street and the approach path is head-on, reduce sensitivity slightly (to avoid false triggers on crossing traffic) and accept that close-range (10–15 feet) head-on detection will work reliably even if 30-foot head-on detection doesn't.
Seasonal Temperature Calibration — Required Annual Maintenance
This is the most important and least-known maintenance requirement for PIR motion sensors: the sensitivity dial setting that works well in December won't work well in July, and vice versa. The official manual states: "Seasonal Temperature Changes — The closer the surrounding temperature is to a person's body heat, the less sensitive the sensor will appear. The greater the temperature difference, the more sensitive the sensor will appear. The SENS control might need to be readjusted toward MIN or MAX as the outside temperature changes for the different seasons. This is a normal part of the light sensor's operation."
- Summer problem: Ambient temperature approaches body temperature (98.6°F). Heat contrast between a person and the background is small. Sensor appears less sensitive than in winter. Fix: rotate SENS dial toward MAX to compensate for reduced contrast.
- Winter problem: Cold ambient temperature creates high contrast between a person and the cold background. Sensor appears very sensitive — false triggers from passing cars, wind-blown objects, animals. Fix: rotate SENS dial toward MIN to require stronger contrast before triggering.
- The practical schedule: Check and adjust the SENS dial at the spring daylight saving time change (increase sensitivity) and again at the fall change (decrease sensitivity). This biannual check catches the worst seasonal extremes.
The Lens Shield: When and How to Use It
The lens shield is one of the most useful — and most overlooked — accessories included with the PF-4300-BK. Many owners discard it with the packaging without realizing it solves specific, common problems.
What the Lens Shield Does
The lens shield is a physical cover that installs over the PIR sensor lens to block detection from specific directions. By partially covering the sensor, it narrows the field of view, preventing the sensor from detecting heat sources in areas you don't want it to monitor.
When to Install the Lens Shield
The official manual identifies two primary scenarios: "If you suspect that a heat source of this type is falsely triggering the sensor and reducing the sensitivity does not solve the problem, then a lens shield (included) can be installed." Common false-trigger heat sources that the manual lists include: dryer exhaust vents, air conditioning units, direct sun heating dark surfaces (dark asphalt, black cars), and other motion-generating heat sources like large animals. If reducing the SENS dial doesn't stop false triggers from a specific direction, the lens shield physically blocks detection from that direction rather than reducing overall sensitivity.
Specific Lens Shield Installation Scenarios
- Street traffic: The light triggers every time a car passes on the street, even with SENS at minimum. The lens shield can be positioned to block the sensor's view toward the street while preserving detection coverage of the driveway and entry path.
- Neighbor's HVAC: A heat pump or air conditioner condenser on the neighboring property runs at night and periodically triggers the sensor. The lens shield blocks the direction of that equipment.
- Sun-heated surfaces: A south-facing dark patio surface heats significantly in afternoon sun and, as it cools after sunset, creates heat differential patterns that false-trigger the sensor. The lens shield blocks detection of that surface sector.
- Multi-unit buildings: Adjacent units' door openings or HVAC discharges appear in the sensor's field of view. The lens shield narrows coverage to the intended entry area only.
Complete Troubleshooting Guide — All Symptoms from the Official Manual
This table reproduces the complete troubleshooting guide from the PF-4300-BK owner's manual, with all documented symptoms, possible causes, and solutions. Check the 1½-minute calibration wait before beginning any troubleshooting sequence.
| Symptom | Possible Cause | Solution |
|---|---|---|
| Light will not come on | Wall switch is off | Turn wall switch on |
| Light will not come on | Bulbs loose or burned out | Check and reseat or replace bulbs; confirm correct base type (E12 candelabra) |
| Light will not come on | Fuse blown or circuit breaker tripped | Reset breaker or replace fuse; if it trips again, a wiring fault is present — call an electrician |
| Light will not come on | Daylight shutoff is active (photocell sensing daylight) | The light will not activate in AUTO mode during daylight hours — this is normal operation; wait for dusk or switch to MANUAL mode for daytime testing |
| Light will not come on | Sensor circuitry is in calibration period | Wait 1½ minutes after power-on for the circuitry to calibrate before testing |
| Light will not come on | SENS (sensitivity) set too low | Rotate SENS dial toward MAX; also consider seasonal adjustment (winter = lower sensitivity needed; summer = higher) |
| Light will not come on | Approaching sensor head-on (not across coverage area) | Walk across the sensor's field of view rather than directly toward it; this is the sensor's least-sensitive direction by design |
| Light turns on by itself / false triggers | DualBrite switch active (3H, 6H, or D setting) | The accent half-power mode is operating as designed; if unwanted, slide DualBrite switch to Off position |
| Light turns on by itself / false triggers | Sensitivity set too high | Rotate SENS dial toward MIN; also consider seasonal adjustment (summer = higher sensitivity setting needed) |
| Light turns on by itself / false triggers | External heat source near sensor (HVAC, dryer vent, dark surface heated by sun) | Reduce sensitivity first; if problem persists, install the lens shield to block detection from the direction of the heat source |
| Light turns on by itself / false triggers | Light control in MANUAL mode | Switch to AUTO: flip wall switch off for one minute, then back on; fixture will reset to AUTO after calibration period |
| Light stays on continuously | DualBrite switch set to D (dusk-to-dawn) | This is normal DualBrite operation — set DualBrite switch to Off if continuous half-power is not desired |
| Light stays on continuously | Light control in MANUAL mode | Flip wall switch off for one minute, back on to reset to AUTO |
| Light stays on continuously | Repeated motion is being detected | Check for moving heat sources in range; consider reducing SENS or installing lens shield |
| Light flashes or flickers | Control in TEST mode warming up | Normal during first 1½-minute calibration period; also normal in TEST mode during initial cycling |
| Light flashes or flickers | Sensitivity set too high with multiple heat sources | Reduce sensitivity; install lens shield if a specific heat source direction is causing the issue |
| Light comes on during the day | Fixture is in MANUAL mode | MANUAL mode bypasses the photocell; reset to AUTO (power off one minute, back on) |
| Light does not stay on long enough | ON-TIME switch set to TEST | Move ON-TIME switch from TEST to 1, 5, or 10 minutes |
| Light does not stay on long enough | ON-TIME set to 1 minute | Move ON-TIME switch to 5 or 10 minutes for longer on-time |
LED Retrofit: Replacing the Original Candelabra Incandescent Bulbs
The PF-4300-BK was designed for candelabra base incandescent bulbs at 25W maximum per socket. LED replacements in the same base format reduce energy use significantly and eliminate the frequent bulb replacement that incandescent bulbs require in outdoor conditions.
The Correct Bulb Spec
- Base type: E12 candelabra screw base (the small base, not the medium E26 household base)
- Shape: Type B — this refers to the "bullet" or "flame-tip" bulb shape. Some sources also call this a "torpedo" shape. The Type B designation means a tapered shape, not a round globe shape, which preserves the original fixture's appearance through the glass panels.
- Maximum per socket: 25W incandescent equivalent (or the stated wattage on the fixture label inside the canopy — always defer to the label). A 4–5W LED Type B candelabra bulb is typically equivalent to 25–40W incandescent in light output.
- Total load limit: 100W across both sockets combined. With LED bulbs at 4–5W each, the actual total draw is under 10W — well within any load limit and well within the sensor's 200W capacity rating.
DualBrite and LED Dimming Compatibility
The DualBrite half-power accent feature reduces the voltage to the lamps to achieve half-power output. Traditional incandescent bulbs dim smoothly at lower voltages. Many LED bulbs, however, behave unpredictably at reduced voltage — they may flicker, buzz, not light at all, or light inconsistently at the half-power DualBrite voltage level. If you plan to use DualBrite accent mode, test LED bulbs carefully at the DualBrite setting before committing to them. Look specifically for LED candelabra bulbs marked as "dimmable" — these are far more likely to handle the voltage reduction smoothly than non-dimmable LED bulbs. See the Portfolio bulb replacement guide for the broader framework on LED compatibility with older Portfolio fixtures.
Light Output Comparison
| Bulb Type | Wattage (each) | Est. Lumens | Expected Life | DualBrite Compatible? |
|---|---|---|---|---|
| Original: Incandescent Type B E12 | 25W | ~220 lm | 1,000–2,000 hrs | Yes — dims smoothly |
| LED Type B E12 Dimmable | 4–5W | ~300–400 lm | 15,000–25,000 hrs | Generally yes — verify |
| LED Type B E12 Non-Dimmable | 4–5W | ~300–400 lm | 15,000–25,000 hrs | Likely no — may flicker |
Current Replacement Fixtures for the Discontinued PF-4300-BK
The Portfolio PF-4300-BK has been discontinued along with the entire Portfolio lighting brand. If the fixture housing is damaged beyond repair, or if you simply want a current-production equivalent, here's what to look for.
What Made the PF-4300-BK Distinctive
The PF-4300-BK's defining features were: diecast metal construction (more durable than plastic), DualBrite two-level operation, 360° sensing, and a traditional porch-lantern form factor. Most modern replacements offer at least some of these features.
Heath Zenith Equivalents — Same Manufacturer
Since the PF-4300-BK was manufactured by HeathCo LLC (Heath Zenith), the closest current equivalents are Heath Zenith motion-sensing porch lights in the SL-4000 and SL-4300 series sold through hardware and home improvement stores. These use the same underlying sensor technology and DualBrite system. The SL-4300 series is the Heath Zenith retail equivalent of the PF-4300-BK portfolio fixture. See the Portfolio lighting alternatives guide for current side-by-side comparisons with confirmed specs.
What to Specify When Searching for a Replacement
- Diecast or die-cast aluminum construction (not plastic)
- 120V, E12 candelabra base, two sockets
- PIR motion sensor with 360° coverage and adjustable sensitivity
- DualBrite or two-level operation (half-power accent + full-power motion response)
- Minimum 30-foot detection range
- ENERGY STAR certification preferred
For a complete current-product comparison including Defiant, Regent, and other current Lowe's and Home Depot porch light motion sensors, see the Portfolio replacement guide and the discontinued Portfolio lighting resource.
Portfolio PF-4300-BK FAQ
What bulb does the Portfolio PF-4300-BK use?
The PF-4300-BK uses a Candelabra Base, Type B bulb, 25 Watt Maximum per socket. E12 screw base; Type B (bullet or flame-tip shape). Total fixture maximum is 100W across both sockets. LED replacement: a 4–5W dimmable Type B E12 candelabra LED, which produces equivalent or better light output at a fraction of the wattage. Use dimmable LEDs if you plan to use the DualBrite half-power accent feature. See the Portfolio bulb replacement guide for full LED compatibility details.
Why does my Portfolio PF-4300-BK turn on by itself or stay on during the day?
The most likely cause is the DualBrite accent mode being active — check the DualBrite switch position on the sensor head. If set to 3H, 6H, or D, the light runs at half power during those periods by design. If it's triggering at full power unexpectedly, check: sensitivity set too high (rotate SENS toward MIN); a nearby heat source like a dryer vent or HVAC unit; fixture stuck in MANUAL mode (flip wall switch off for one full minute, then back on to reset to AUTO). If DualBrite is set to D (dusk-to-dawn), the half-power light running all night is not a malfunction — it is the fixture operating exactly as the D setting specifies.
How do I switch the PF-4300-BK from AUTO to MANUAL mode?
Flip the wall switch OFF for one second, then back ON. This toggles the fixture between AUTO and MANUAL mode. MANUAL mode only works at night (the photocell returns it to AUTO at dawn) and only when the ON-TIME switch is at 1, 5, or 10 minutes. If you lose track of which mode you're in: turn power off for one full minute, then back on — after the 1½-minute calibration period the fixture returns to AUTO mode automatically.
Where can I get a replacement PF-4300-BK or parts for it?
Portfolio is a discontinued Lowe's exclusive brand. HeathCo LLC's service line (1-800-858-8501) listed in the original manual is no longer operational for Portfolio warranty claims. The fixture housing, sensor module, and lens shield are not available as separate replacement parts through any current distribution channel. For the lens shield specifically — the most commonly needed accessory — universal PIR sensor lens shields and "blinder" accessories for Heath Zenith / HeathCo fixtures are sometimes available through Heath Zenith parts channels since the PF-4300-BK was manufactured by the same company. For a full replacement fixture, see the Heath Zenith SL-4300 series as the closest current equivalent. See the replacement parts guide and discontinued Portfolio lighting guide for the current sourcing framework.
My PF-4300-BK sensor seems less sensitive in summer than in winter. Is it broken?
No — this is documented normal PIR sensor behavior. In summer, ambient temperature is close to body temperature, reducing the heat contrast the sensor detects. In winter, the cold background amplifies the contrast. The official manual explicitly states that the SENS dial must be readjusted seasonally: toward MAX in summer (to compensate for reduced contrast), and toward MIN in winter (to prevent false triggers from the amplified contrast). Recalibrating twice a year at the seasonal transitions is normal maintenance, not a sign of malfunction.
Related Portfolio Lighting Guides
- Portfolio Lighting Manuals
- Model Number Lookup
- Portfolio Bulb Replacement Guide
- Portfolio Troubleshooting Guide
- Discontinued Portfolio Lighting
- Portfolio Lighting Alternatives
- Best Portfolio Replacements
- Model Library & Repair Index
- Model Parts Directory
- Landscape Lighting Replacement Parts
- Corroded Socket Cleaning & Repair
- Foggy Lens & Condensation Fix
- Portfolio Transformer Manuals
- Transformer Troubleshooting
- Transformer Alternatives
- Why Portfolio Was Discontinued
- LED Bypass Testing Guide
- Codes & Identification Decoder
- Electrical Code Safety Guide