
Bookmark this page: If you are upgrading your outdoor lighting to meet dark sky ordinances or HOA requirements, save this guide so you can come back as you adjust fixtures, change bulbs, and fine-tune your system for full compliance.
Quick Answer: My 7-Point Dark Sky Compliance & Light Shielding Checklist
True Dark Sky compliance isn't just about buying a specific brand of fixture; it is a complete layout strategy built around controlling where every single lumen of light actually lands. When you design a responsible outdoor system, your goal is to eliminate glare, stop light from bleeding into your neighbor's bedroom windows, and protect the nighttime environment, all while keeping your pathways and entry points completely safe.
Whenever I audit an existing landscape design or map out a code-compliant lighting plan for a property, I pass or fail the layout based on these seven absolute field rules:
- 1. Task-Specific Layout Intent: I only place fixtures where light serves a real, physical purpose—like guiding steps, illuminating a walkway, or marking an entry door—rather than blindly flooding an open lawn.
- 2. Fully Shielded Light Sources: I make sure the actual bulb or diode is completely hidden from view; if you can see the bare filament or bare light source while standing back, the fixture is an unshielded glare source.
- 3. Downward-Facing Optical Targeting: I drop all primary fixtures completely below the horizontal plane; any light aimed straight up into the air or angled out past the property line causes immediate skyglow.
- 4. Dropping the Total Lumen Output: Brighter is rarely safer; I drop the brightness levels down to the absolute minimum needed to see clearly, which naturally prevents harsh shadows and visual blindness outside the light beams.
- 5. Shifting to Warmer Spectral Tones: I strictly enforce a maximum color limit of 3000K or lower; blue-rich cool white lighting scatters heavily in the atmosphere and disrupts natural wildlife sleep patterns.
- 6. Smart Automated Controls and Dimmers: I never leave an entire property fully lit on a dummy switch; I install smart timers, motion sensors, or automatic dimdown profiles to turn off accent lights after midnight.
- 7. Hard Boundary Light Trespass Prevention: I physically walk the edge of the property line at night to confirm that no stray light beams cross over fences or bleed onto neighboring homes.
⚠️ CRITICAL COMPLIANCE RISK: Running unshielded floodlights or high-kelvin commercial bulbs will frequently violate municipal environmental ordinances. Setting up an unmanaged lighting system triggers three distinct local citation triggers and severe glare failures that I map out across our zoning code database below.
The color of your bulbs is usually where most homeowners accidentally break Dark Sky standards without realizing it. If you want my practical breakdown comparing warm 2700K against 3000K, and want to see exactly why cool 4000K bulbs cause major vision and code problems outdoors, make sure to read my detailed Landscape Lighting Color Temperature Guide.
Don't guess on your fixture placements or risk an expensive mistake with code enforcement. Use my specific fixture glare charts, shielding blueprints, and local dark sky property templates linked below to build a beautiful, high-end system that respects the night sky.
Dark sky compliance sounds technical, but the actual goal is simple: keep useful light on the ground and off everything else. When homeowners get this right, paths are easier to walk, steps feel safer, the yard looks calmer, and the system wastes less energy.
The problem is that many outdoor systems are designed backward. They start with fixture quantity instead of lighting purpose. That leads to exposed lamps, high color temperature, glare, random aiming, and too much light running too long. This guide reverses that process and gives you a cleaner compliance workflow.
Dark sky performance depends on more than beam control alone. Fixtures also need to hold their shape, shielding, and hardware over time. The Durable Landscape Lighting Materials Guide explains why stronger materials often support better long-term lighting performance.
Reducing light pollution is only part of a responsible outdoor lighting system. Poor wiring, long runs, and overloaded circuits can waste energy before it even reaches the fixture. For a deeper look at system efficiency, see how to minimize voltage drop and reduce energy waste.
Dark-sky compliance is not only about choosing a shielded fixture. Many local rules also control when outdoor lighting must be dimmed or turned off after curfew, especially for decorative, landscape, security, and commercial exterior lighting. If your system stays on all night, even a well-shielded fixture can still create unnecessary sky glow, energy waste, and neighbor complaints. Bird migration, nesting, and habitat disruption are another overlooked part of responsible lighting, which is why our bird-friendly outdoor lighting guide explains how warmer color temperature, lower brightness, timers, and downward aim can reduce nighttime ecological impact without making a property feel unsafe.
Already Have Portfolio Lighting? Here’s How to Upgrade for Compliance
If you already have a Portfolio lighting system installed and your city, county, or HOA has recently passed a dark sky ordinance, you usually do not need to start over. Most existing systems can be upgraded to meet current regulations with a few targeted changes.
- Too bright or harsh → switch to lower output, warmer color temperature bulbs (2200K–2700K)
- Visible glare → adjust fixture angle or add shielding
- Lights running all night → add a timer or photocell control
- Light spilling upward → re-aim fixtures or swap to better cut-off designs
In many cases, compliance is not about replacing your entire system—it is about improving how your current fixtures are aimed, controlled, and powered. If your system also has performance issues like dim lights, flickering, or sections not working, follow a full diagnostic guide here: Portfolio lighting troubleshooting.
Fixing underlying issues first often makes compliance upgrades easier and more effective.
If you are balancing efficiency with responsible outdoor lighting, see the solar vs low voltage energy efficiency guide to compare system performance alongside environmental considerations.
Good outdoor lighting is not only about brightness. The real-world outdoor lighting quality and beam control guide compares glare behavior, heat management, color quality, shielding, and long-term fixture performance.
What You Will Learn
- How dark sky compliance is usually judged in real projects
- What compliant lighting looks like compared to risky lighting choices
- How to review a property or product spec step by step
- Which fixtures and placements usually create the biggest compliance problems
- Why dimming, scheduling, and automation matter as much as fixture choice
- How to improve an older landscape system without starting over
- Answers to the most common dark sky compliance questions
Dark Sky Compliance Checklist
Use this table as the core screening tool before you buy fixtures or approve a layout. It works well for landscape lighting, driveway lighting, entry paths, steps, and small residential or mixed-use projects.
If you are trying to apply dark-sky principles to a real HOA letter or city notice, use our Outdoor Lighting Ordinance Guide to see how shielding, color temperature, lumen limits, and curfew rules are usually enforced in practice.
If you want to go beyond dark-sky compliance and make your yard safer for birds, insects, and other nighttime wildlife, see our wildlife-friendly outdoor lighting guide. It explains how warm color temperature, shielding, and smarter runtime choices reduce ecological impact without sacrificing safety.
In addition to electrical code requirements, responsible outdoor lighting should also follow Dark Sky principles. See the NEC 2026 landscape lighting code updates to understand how modern code trends align with safer, more controlled lighting systems.
Responsible outdoor lighting involves more than reducing glare and sky glow. Runtime schedules, transformer efficiency, beam spread, and fixture wattage all influence the long-term environmental impact of a landscape lighting system. Our guide to reducing the carbon footprint of landscape lighting explains how low-voltage systems and LED retrofits can improve sustainability without sacrificing nighttime visibility.
| Compliance Area | What to Look For | Why It Matters | Fast Fix |
|---|---|---|---|
| Purpose | Every fixture has a clear job such as path guidance, stair safety, or entry recognition | Lighting with no clear task is usually the first source of overlighting | Delete decorative brightness that adds glow but not function |
| Shielding | Fixture hides the light source and aims the beam downward | Reduces glare, light trespass, and uplight | Replace exposed lamps and uncontrolled floods with shielded fixtures |
| Brightness | Light level is only as high as needed for the task | Too much light hurts visual comfort and creates sky glow | Lower lamp output, reduce fixture count, or increase spacing discipline |
| Color Temp | Warm outdoor light, usually 3000K or lower | Warmer light reduces blue-rich output and is friendlier for night environments | Use warmer LED products and compare them with your site goals |
| Controls | Timer, dimming schedule, occupancy logic, or part-night shutoff | Compliance depends on using light only when it is needed | Add timer settings, motion control, or dimmed overnight scenes |
| Aiming | Beam lands on walkway, steps, or façade detail without upward spill | Poor aiming creates glare and lights the wrong surfaces | Re-aim, narrow beam spread, or lower mounting height |
| Trespass | Neighbor windows and property lines stay out of the main beam | Spill light is a common source of complaints and ordinance issues | Use louvers, shields, lower output, or different fixture locations |
Responsible lighting is not only about reducing glare and skyglow. Color quality also matters, especially indoors and near people. Learn more in CRI 95 vs CRI 80 color rendering.
Choosing the correct fixture shape is one of the most important steps in reducing glare, skyglow, and unnecessary nighttime brightness. Our detailed dark-sky-friendly fixture selection guide explains how shielding geometry, beam cutoff angles, lens design, and fixture placement affect upward light spill, neighbor glare, circadian comfort, and long-term outdoor usability far beyond simple lumen ratings alone.
Dark-sky compliance is often viewed through the lens of glare reduction, uplight control, and preserving nighttime visibility, but long-term sustainability involves more than directing light downward. The environmental impact of a lighting system is also influenced by fixture lifespan, maintenance frequency, replacement cycles, energy consumption, and material durability. A fixture that remains operational for twenty years can generate far less waste than multiple shorter-lived replacements, even if both meet the same dark-sky performance standards. For a broader look at the financial and environmental impact of outdoor lighting decisions, review our lighting life-cycle cost analysis guide, which examines how operating costs, maintenance, service life, and replacement schedules affect the true sustainability of a lighting system over time.
Dark-sky compliance is not only a fixture-label issue. Homeowners can reduce visible sky glow by controlling fixture shielding, brightness, color temperature, beam angle, reflective surfaces, and operating hours. If you want a practical homeowner-level breakdown of how sky glow forms above a yard, driveway, patio, or neighborhood street, review our guide to reducing night-sky glow around homes. It explains why small residential lighting decisions can add up across a neighborhood and how to reduce wasted upward light without making outdoor spaces feel unsafe.
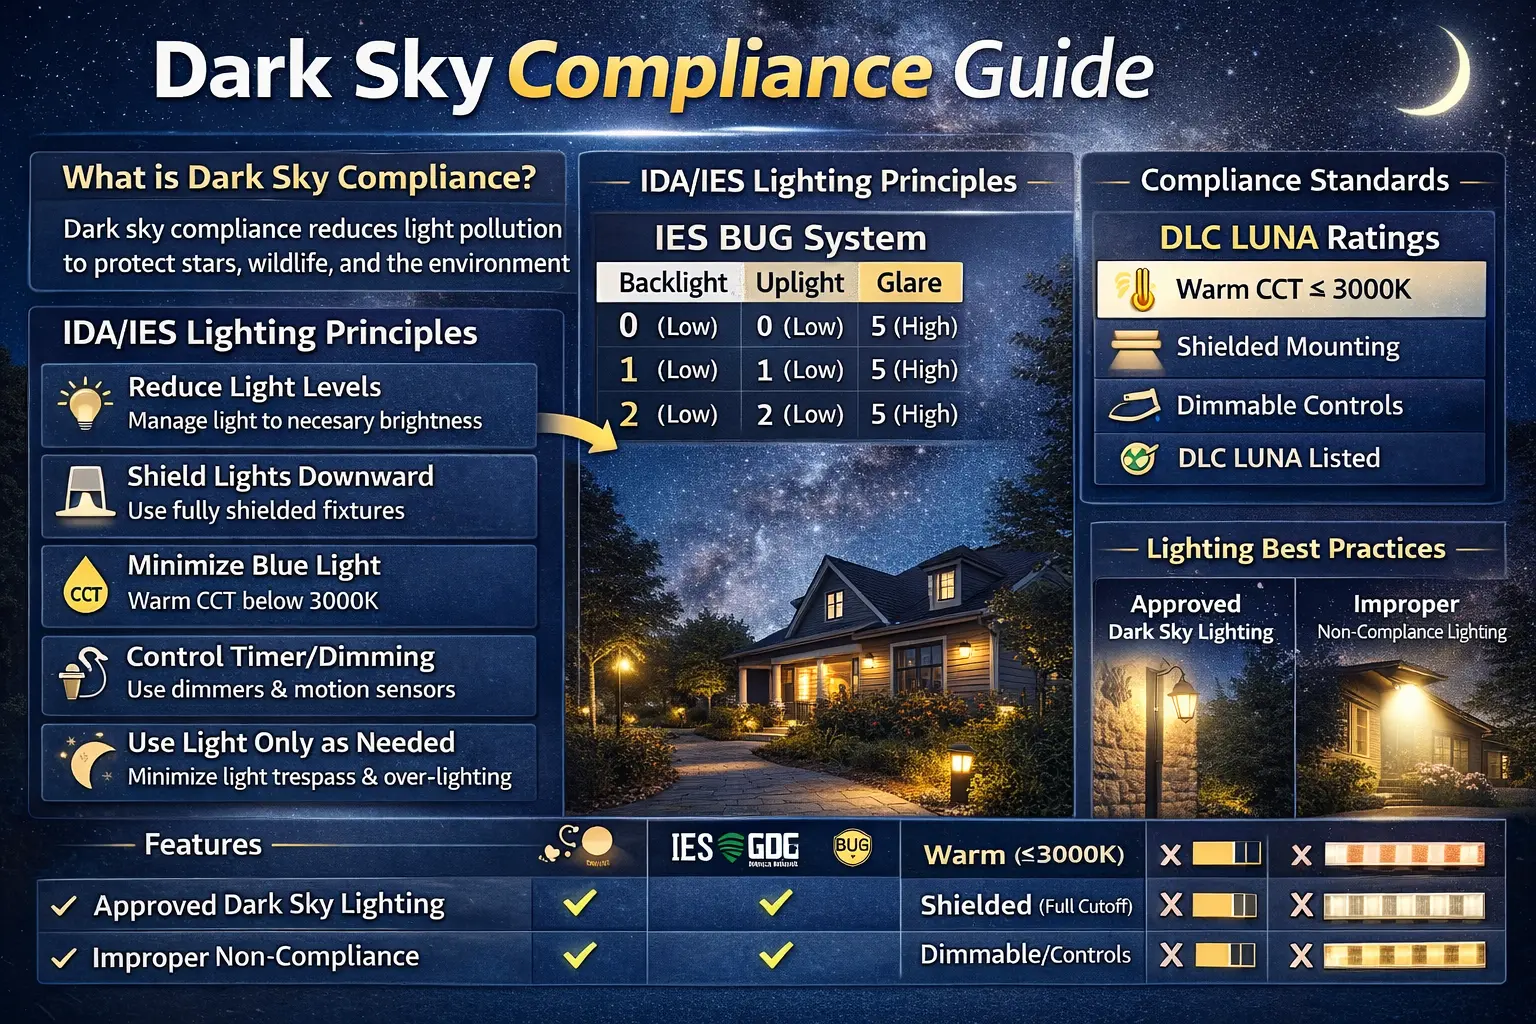
The BUG System: A More Technical Way to Judge Compliance
If you want to evaluate outdoor lighting at a more technical level, the BUG system is one of the clearest ways to do it. BUG stands for Backlight, Uplight, and Glare. Instead of simply saying a fixture is “shielded,” the BUG framework helps describe how well the fixture controls light in the directions that most often create compliance problems.
For dark sky focused projects, the most important part is usually the Uplight rating. A fixture with a U0 rating produces no uplight above the horizontal plane, which is the gold standard when you are trying to reduce sky glow and keep the beam on the intended task area.
If you want a deeper technical breakdown of how light behavior is measured, see Understanding BUG Ratings for Outdoor Lighting to learn how backlight, uplight, and glare affect compliance and real-world performance.
| BUG Element | What It Measures | Why It Matters |
|---|---|---|
| Backlight | Light spilling behind the fixture | Helps reduce unwanted light toward property lines or nearby windows |
| Uplight | Light emitted above horizontal | Directly affects sky glow and dark sky compliance |
| Glare | High-angle brightness visible to people | Impacts comfort, visibility, and neighbor complaints |
Reducing glare is only one part of responsible outdoor lighting. Energy consumption, transformer efficiency, fixture runtime, and bulb technology all affect the long-term environmental impact of a low-voltage system. Our landscape lighting carbon footprint guide explains how LED conversion, runtime control, beam direction, and system design influence both electrical efficiency and overall outdoor lighting emissions.
On residential projects, you may not always see full BUG data on every product listing, but the concept still matters. The more a fixture controls backlight, uplight, and glare, the closer it usually gets to a truly compliant outdoor lighting result.
One of the easiest ways to improve dark sky compliance is to control how long your lights stay on. Instead of running all night, use timers or smart controls to reduce unnecessary lighting. See the Smart Outdoor Lighting Controls Guide to learn how to automate your system.
Many homeowners focus only on visible sky glow, but excessive lumen output can also damage nighttime visibility, create glare fatigue, and overwhelm natural darkness at ground level. The lumen pollution vs. light pollution guide explains why brightness itself has become a growing outdoor lighting problem.
Compliant Choices vs Risky Choices
One of the most common real-world problems homeowners run into is light spilling into neighboring properties or creating glare from the street. If you are dealing with that situation directly, follow a step-by-step approach in our guide to fixing light trespass and glare issues.
One of the easiest ways to understand dark-sky compliance is to compare how light behaves before it reaches the ground. A shielded fixture controls the beam so useful light stays below the horizontal plane, while an unshielded fixture sends light sideways and upward where it can create glare, skyglow, and neighbor complaints. If you are deciding whether an existing fixture should be replaced, adjusted, or retrofitted, start with this shielded vs. unshielded outdoor lighting guide before choosing new lamps or changing brightness levels.
| Better Dark Sky Choice | Riskier Choice | What Usually Happens |
|---|---|---|
| Shielded path or step light | Exposed globe or bare lamp | Shielded light keeps visibility on the walking surface while exposed lamps create glare and visible hot spots |
| 3000K or warmer | 4000K to 5000K cool white | Warmer light is usually more comfortable and aligns better with dark sky focused standards |
| Curfew, dimming, or control scheduling | Dusk-to-dawn at full brightness | Controls cut waste and nighttime spill while always-on lighting increases complaints and energy use |
| Low mounting with beam control | Tall bright path fixture | Lower installations are easier to aim and less likely to throw light into windows or the sky |
| Focused accenting on one feature | Wide flood coverage across yard | Targeted lighting improves contrast while broad coverage washes out the property and removes visual hierarchy |
Good vs Bad Fixture Cut-Off Levels

One of the fastest ways to judge whether a fixture is likely to support dark sky compliance is to look at its cut-off behavior. In plain language, this means asking how much light escapes above the horizontal line instead of staying on the ground where it belongs.
Dark-sky performance is not only about shielding and brightness. Light color also plays a major role in sky glow, glare, and biological disruption. Learn more in this guide to the biological impact of outdoor light color.
Many dark-sky lighting principles also improve senior safety because shielded fixtures reduce glare and improve contrast on walking surfaces. Visit the Senior Safety Lighting Guide for aging-in-place path lighting strategies using controlled low-glare illumination.
A well-shielded fixture still needs to survive the environment where it is mounted. Coastal corrosion can seize an adjustable shield, desert UV can weaken plastic glare-control components, and snow or soil movement can change the fixture angle enough to create new uplight and glare. The Outdoor Lighting Climate Performance Guide explains how regional weather and site conditions affect fixture alignment, housing life, seal performance, and long-term dark-sky compliance.
| Fixture Type | How It Handles Light Above 90° | Compliance Value |
|---|---|---|
| Full Cut-off | No light above 90° | Gold standard for dark sky focused projects |
| Cut-off | Less than 2.5% of light above 90° | Often acceptable when carefully aimed and controlled |
| Non-Cut-off | Uncontrolled light above 90° | Usually the first type to avoid in compliance work |
Dark-sky-friendly lighting is not only about reducing glare and skyglow; lower lumen output and smarter runtime schedules also reduce long-term electricity use. The landscape lighting energy calculator helps estimate how fixture wattage, timer settings, and reduced nighttime brightness affect yearly operating cost.
Quick Visual: Full Cut-off vs Cut-off vs Non-Cut-off
Full Cut-off
No light above 90°
Best choice for dark sky compliance, lowest uplight risk, strongest comfort and control.
Cut-off
Less than 2.5% light above 90°
Can work well when output is low, aiming is controlled, and glare remains minimal.
Non-Cut-off
Uncontrolled glow above 90°
Creates more sky glow, more glare, and more risk of spill into neighboring sightlines.
Fast Interpretation
If you can see the bright lamp source easily from a distance, the fixture is often moving away from compliance rather than toward it.
Step-by-Step Dark Sky Compliance Roadmap
1. Start with the task, not the fixture
Write down exactly what each area needs. A front walk may need path visibility. A stair run may need tread definition. A driveway may need edge guidance. A tree may not need lighting at all if the goal is simply orientation. Once the task is clear, the fixture type becomes easier to choose.
2. Review the layout before adding brightness
A poor layout often gets “fixed” by adding more output. That is usually the wrong move. Better spacing and better beam control do more for compliance than a brighter lamp. Use outdoor lighting planning and Portfolio landscape lighting ideas to rethink the overall pattern before raising output.
3. Choose a shielded fixture family
Path lights, bollards, step lights, wall lights, and spot fixtures all behave differently. In dark sky work, the safest choice is usually the fixture that hides the source and keeps the beam low. For stair and grade changes, Portfolio step lighting and outdoor stair lighting often solve the safety need with less glare than bright flood coverage.
4. Set the color temperature early
Do not leave color temperature as an afterthought. Warm outdoor lighting is one of the most visible compliance decisions on the whole property. If you need help choosing between warmer and cooler looks, use the landscape lighting color temperature guide before ordering fixtures.
Dark-sky design is not only about reducing light pollution for neighbors and wildlife. Our guide on human health and outdoor lighting design explains how excessive brightness, poor shielding, and high-Kelvin LEDs can affect sleep quality, eye strain, visual adaptation, and nighttime recovery. It also explains why properly shielded warm lighting often feels dramatically more comfortable even at lower lumen levels.
5. Add controls that match real use
A compliant system should not treat every hour of the night the same. Entry and path lights may need early evening operation, then reduced output later. Decorative accenting may need a curfew. Security-related layers may need motion logic rather than full-night brightness. For a more advanced version of this strategy, review AI outdoor lighting systems and dark sky AI automation.
Dark-sky lighting and biologically friendly lighting often overlap because both favor warmer, lower-glare nighttime illumination. The backyard circadian lighting guide explains how warm landscape lighting can reduce harsh nighttime exposure.
Fixtures, Placement, and Beam Direction
The easiest way to lose dark sky compliance is to use the wrong fixture in the wrong location. Decorative fixtures with exposed sources often look attractive on a product page but produce visible glare once they are installed at eye level or along a narrow walk.
For most low-level residential work, compliant placement usually means shorter fixtures, narrower beam control, and careful spacing. That is especially true around paths, driveways, bed edges, and steps. Use these companion guides as needed:
Path and Walkway Guidance
Use lower glare fixtures and better spacing for safer walking surfaces without washing out the whole yard.
View path lightingStep and Grade Change Lighting
Step lights often solve compliance and safety better than brighter flood coverage.
View step lightingDriveway and Approach Lighting
Guide vehicles and pedestrians without turning the whole frontage into a glare source.
View driveway guideLow Voltage Outdoor Layouts
Low voltage systems make it easier to fine-tune brightness, spacing, and fixture count.
View low voltage lightingIf your current system uses broad flood lighting where a shielded path, step, or wall fixture would do the job better, that one change often improves the whole site faster than a complete fixture replacement.
Reducing light pollution is only one part of better lighting. For deeper insight into spectrum quality and human impact, see biological lighting infrastructure .
Dark Sky design also helps protect backyard wildlife. For pet-safe cable routing and animal-friendly fixture choices, see landscape lighting safety for pets and wildlife.
Controls, Dimming, and Curfews Are Part of Compliance
One of the biggest mistakes in outdoor lighting is thinking the fixture alone determines whether a project is dark sky compliant. Controls matter just as much. A warm shielded luminaire that runs at full output all night can still create unnecessary glare, spill, and wasted energy.
Good compliance usually includes one or more of the following:
- scheduled shutoff or reduced-output late-night scenes
- motion-based response for infrequently used areas
- dimming after peak activity hours
- separate zones so paths, steps, and accent lighting do not all run the same way
If your existing transformer and wiring are still usable, a control upgrade may be all you need. See outdoor transformer lighting, installation and instructions, and Portfolio lighting hybrid smart upgrade guide for practical upgrade paths.
How to Retrofit an Existing System Without Starting Over
Many properties already have wiring, transformers, and fixture locations in place. That does not mean you need a full rebuild. A dark sky retrofit usually starts with the highest-impact problems first:
- replace exposed or uncontrolled fixtures
- lower color temperature where cool white lamps are too harsh
- reduce output in the brightest zones
- add shielding or change aiming where neighbor spill or window glare is obvious
- separate decorative zones from path and safety zones
- add timer or dimming logic so the property is not stuck in full-brightness mode all night
If the system is older, the retrofit may also be the right time to review Portfolio LED landscape lighting, replacement parts and accessories, and lighting alternatives if the current product family cannot be adjusted cleanly.
Retrofitting Popular Portfolio Fixtures
One of the biggest advantages of focusing on Portfolio lighting is that many older fixtures can be improved without replacing the entire system. In real-world retrofit work, the goal is often to keep the original fixture body while improving compliance through better lamps, better aiming, lower output, and better controls.
A common example is the classic Portfolio bronze path light. Many of these fixtures can be made more dark-sky friendly by replacing a standard 3000K bi-pin lamp with a 2200K amber LED bi-pin replacement. That simple change reduces harshness, lowers blue-rich output, and often makes the path feel more comfortable at night without losing useful visibility.
| Fixture Type | Common Problem | Retrofit Move |
|---|---|---|
| Classic bronze Portfolio path light | Too white or too bright at eye level | Swap 3000K bi-pin for 2200K amber LED |
| Older exposed-lamp path fixtures | Visible glare and spill | Reduce lamp output and review shielding |
| Driveway or entry fixtures on long runs | Overlighting near entry zones | Lower output and separate decorative vs safety zones |
| Accent fixtures aimed too high | Unnecessary uplight | Re-aim beam and narrow spread |
This kind of Portfolio-specific retrofit advice is where compliance pages become more useful than generic outdoor lighting blogs. It shows what can actually be improved in a real installed system instead of only repeating general dark sky principles.
Common Dark Sky Compliance Mistakes
- using cool white fixtures because they look brighter in product photos
- placing fixtures too high for the task
- using wide beam spread where narrow directional light would work better
- running decorative accent lighting at full brightness after midnight
- ignoring glare from driveways, side yards, and second-story sightlines
- assuming brighter equals safer instead of improving placement and contrast
A cleaner outdoor system is usually more comfortable to walk through and easier to live with. Compliance does not mean a dark unusable property. It means a disciplined lighting plan that performs the task without sending light everywhere else.
Fixture shielding matters, but finish durability matters too. The outdoor lighting finish weathering guide compares how coatings, metals, and outdoor fixture finishes hold up in humid, coastal, and dry climates.
Dark-sky planning connects directly to wildlife protection, photometric documentation and code-safe fixture placement. For a more complete technical approach, review the turtle-safe wildlife-friendly lighting code guide, the photometric lighting plan code guide, the NEC 300.5 underground conduit fill calculator guide, and the dock and pier lighting safety standards guide for projects where shielding, wiring, water exposure and light trespass all overlap.
Dark-Sky Performance Still Requires Electrical Reliability
A dark-sky-friendly lighting plan should still be built on reliable fixture maintenance and protected power. If an older Portfolio fixture flickers or changes output, the problem may be a contact issue that needs this Portfolio socket corrosion repair guide. If the transformer is exposed to storms or repeated power events, use the Portfolio transformer surge protector installation guide. For fixture selection, this dark-sky compliance and IDA certification guide explains why glare control, shielding and product certification are related but not the same thing.
Dark Sky Compliance FAQ
What makes an outdoor light dark sky compliant?
It should have a clear purpose, send light only where needed, keep brightness as low as practical, use warm color temperature, and rely on controls so the system is not running unnecessarily.
Is 3000K acceptable for dark sky lighting?
In many responsible outdoor lighting programs and ordinances, 3000K is treated as the practical upper limit for warm outdoor lighting. More sensitive sites sometimes go warmer than that.
Why is shielding so important?
Shielding hides the bright source, reduces glare, limits light trespass, and helps keep output off the sky. It is one of the fastest ways to improve comfort and compliance at the same time.
Can I retrofit my current system instead of replacing everything?
Usually yes. Many projects improve dramatically by changing fixture heads, lowering color temperature, reducing output, re-aiming the beam, and adding controls to an existing low voltage system.
Dark Sky Compliance, Responsible Outdoor Lighting, and Better Nighttime Design
This page is designed to help readers make smarter outdoor lighting decisions before they overspend on fixtures that create glare, spill light, or unnecessary brightness. The goal is not to make properties darker for the sake of darkness. The goal is to make each outdoor light more useful, more comfortable, and more controlled.
If you are comparing fixture styles, wiring layouts, and control options, move between this guide and the related pages above so your final system works as one coordinated plan instead of a collection of disconnected parts.
Expert-Verified Troubleshooting
Every technical guide on PortfolioLighting.net is reviewed for accuracy andcurrent standards. My troubleshooting procedures are based on 25+ years of field experience and are maintained by Philip Meyer to ensure accuracy and electrical safety compliance.