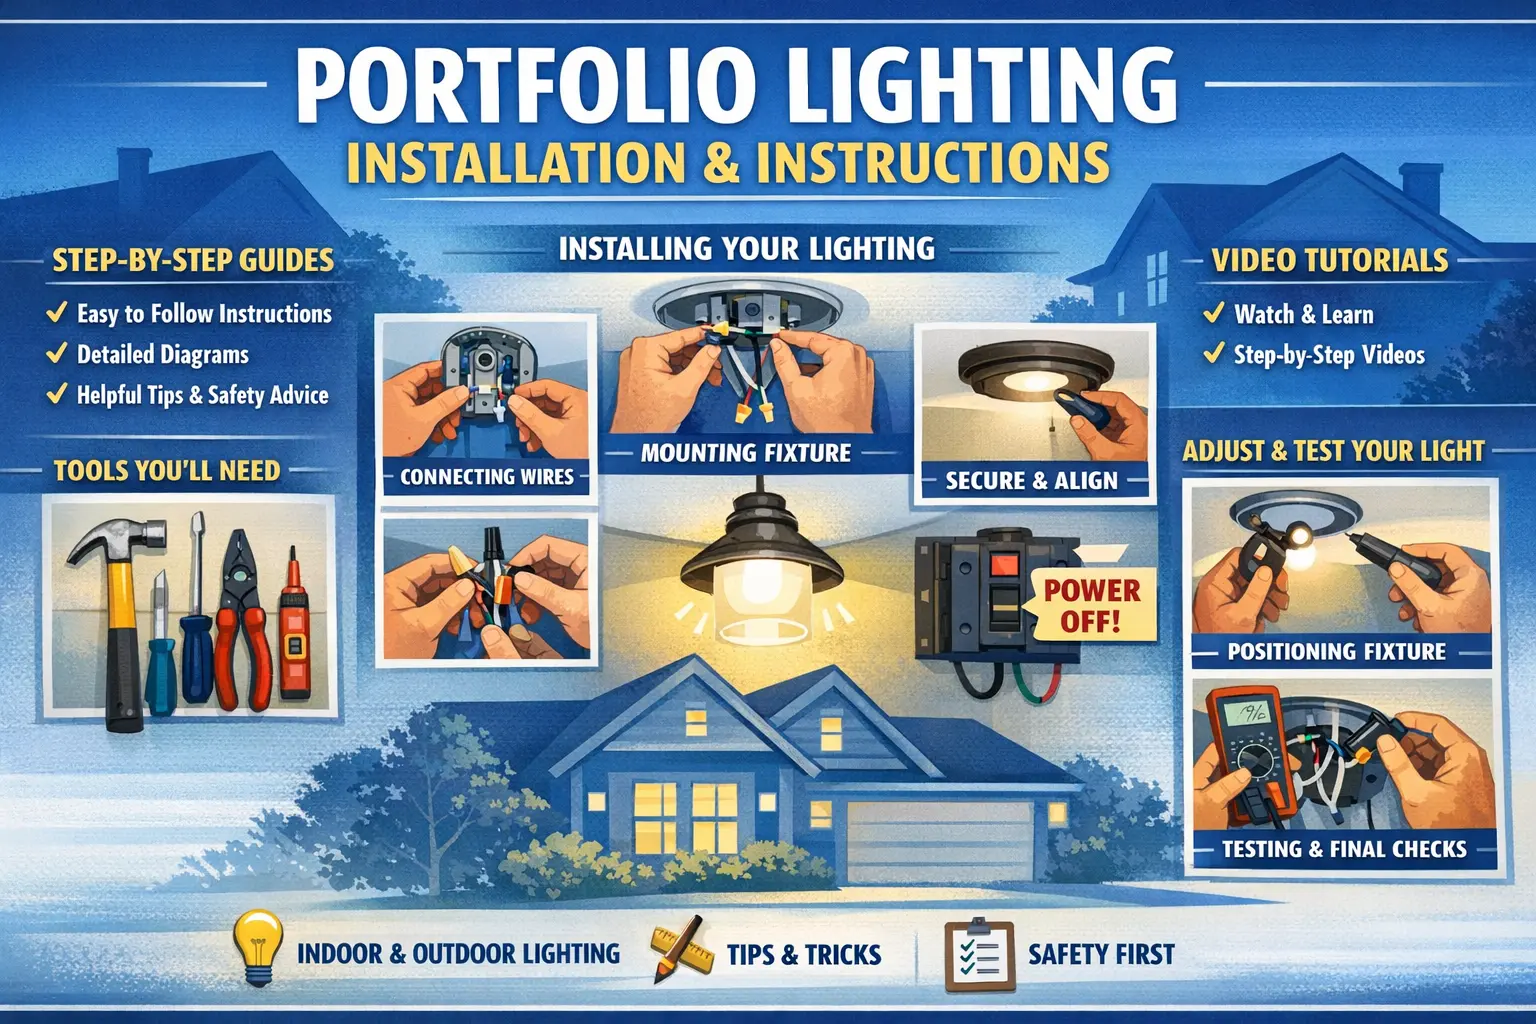
Installation Need
Mounting guidance
Why it matters: Helps the fixture sit securely, align correctly, and avoid movement after installation.
Best resource: Instruction sheet or fixture manual

If you are installing Portfolio lighting, the process is usually simpler than it looks. Most setups follow the same steps: plan the layout, mount the fixture, connect the wiring, and test the system. The key is choosing the right fixture type and following the correct installation steps for that specific light.
Many homeowners look for Portfolio lighting installation instructions because they want a cleaner DIY setup, easier wiring, better placement, and fewer mistakes during mounting. A good instruction manual can also help with troubleshooting if a light does not work correctly after installation.
This page is designed to help you think through Portfolio lighting installation in a more practical way. It covers planning, safety, fixture selection, wiring basics, manuals and PDFs, and where installation guides fit into indoor and outdoor lighting projects.
If your installation project also involves a missing transformer, cracked glass, worn connector, broken stake, or other damaged component, the fastest next step is usually checking the Portfolio lighting replacement parts page before replacing the entire fixture.
Browse Portfolio Replacement PartsIf you need more help identifying parts, visit our complete Portfolio Lighting troubleshooting hub.
Portfolio Installation & Setup Center
Installation details can change by model, fixture family, transformer capacity and product generation. Use the Portfolio model or item number first when it is available, then pair the correct manual or wiring diagram with the type of system you are installing. This keeps landscape, transformer and indoor-fixture instructions connected to the product they actually apply to.
This Portfolio Lighting Installation Instructions, Wiring Diagrams, Manuals & Setup Guide resource is part of the Portfolio Lighting repair and maintenance library. For an existing system, identify the exact fixture or transformer model and check its label and original instructions before using broader lighting advice.
Portfolio owner’s first step: Use the Portfolio model lookup and product guides to connect this topic to your own installation.
Transformers, cable, connectors, fixture spacing, voltage drop.
Ceiling lights, pendants, recessed lighting and wiring.
Find installation PDFs by Portfolio model number.
The secret to a flawless Portfolio lighting installation is mapping out your power balance before hanging a single bracket or digging a trench. Whether you are setting up heavy indoor dining tracks or running a low-voltage line across your lawn, skipping the math up front will almost always leave you with dim bulbs, buzzing components, or a tripped breaker box.
Whenever I step onto a property to tackle an installation, I follow these seven strict field rules to ensure the setup is safe, durable, and clean:
⚠️ MY WARNING ON GUESSWORK: Guessing your way through an unclear wiring layout or pushing a line past its electrical capacity won't just stop the lights from working—it can trigger three permanent system-wide hardware failures detailed in my wiring diagrams below.
Over the years, I’ve tried rushing these steps to save a few minutes, and it always bites back. In practice, taking the time to test power first, double-check your connections, and verify your line totals is what keeps an installation predictable, safe, and built to last.
Don't start stripping wires or mounting brackets blindly. Use the dedicated section directories below to jump straight to the exact layout templates, wire sizing charts, and step-by-step assembly guides designed for your specific project.
Whether you're installing a brand-new Portfolio fixture or repairing a discontinued system, this guide connects every major installation resource on PortfolioLighting.net—from original manuals and wiring diagrams to replacement parts, troubleshooting, and model-specific repair information.
Complete step-by-step instructions covering indoor lighting, landscape lighting, transformers, wiring, troubleshooting, and replacement procedures.
One of the web's largest collections of discontinued Portfolio model numbers with repair information and compatibility guidance.
Original installation instructions, wiring diagrams, operating manuals, transformer documentation, and setup references.
Locate bulbs, globes, connectors, transformers, stakes, lenses, mounting hardware, sockets, timers, and other compatible replacement components.
Portfolio lighting installation usually goes better when the work starts with planning instead of guesswork. Choosing the right fixture, reviewing the manual, thinking through the placement, and following safe wiring practices can make a major difference in both the installation process and the final lighting result.
I’ve installed a lot of lighting systems over the years, and in my experience, the biggest problems usually start before the install even begins. I’ve seen people open the box and start wiring without ever thinking about placement or layout.
I remember one install where I rushed into mounting the fixture, and later realized the light was aimed completely wrong for the space. I had to take everything back down and redo it, which is something I’ve learned to avoid by planning first every time.
Plan first. Install second.
Whether you are installing track lighting, recessed lights, pendant fixtures, wall sconces, or outdoor low voltage systems, the right instructions can save time and help avoid common setup mistakes.
Before installing a new fixture, make sure you have the correct replacement. This buy Portfolio lighting page helps you find compatible fixtures, replacement units, and available models before starting installation.
If your lights do not work after installation, use the Portfolio lighting troubleshooting guide to diagnose power, wiring, transformer, and connection issues quickly.
If your installation includes an outdoor transformer, use the outdoor lighting transformer mounting code guide to choose a safe mounting height, receptacle location, weather cover, drip loop, and serviceable wall or post location.
Most Portfolio lighting installations follow the same basic steps. Start by planning the layout, turn off power, mount the fixture, connect wiring, and test the system after installation.
Use the sections below for detailed installation steps for indoor and outdoor Portfolio lighting systems.
If your transformer is not turning on, clicking, or not following the timer settings after installation, the issue is often overload or setup-related. This Portfolio 0805279 troubleshooting guide walks through reset steps, timer setup, and how to fix common problems with smaller 60W units.
For exact wiring layouts and mounting hardware details, refer to Portfolio lighting technical manuals and wiring diagrams before completing installation.
Outdoor lighting installation quality depends heavily on the connection method. The low-voltage plug and limited-energy connector guide explains how connector size, torque pressure, moisture sealing, and wire gauge compatibility affect long-term lighting reliability.
Most installation mistakes happen when steps are done out of order. Use this sequence before mounting, wiring, or testing any Portfolio fixture.
Installer tip: Do not permanently tighten or bury anything until the fixture has been tested and aimed correctly.
Many lighting failures originate during installation rather than years later. Incorrect transformer sizing, poor wire connections, overloaded circuits, inadequate cable protection, and improper fixture placement can all shorten system life. The Portfolio Lighting Failure Database explains how installation mistakes eventually develop into the most common long-term Portfolio lighting failures.
For Portfolio Lighting Installation Instructions, Wiring Diagrams, Manuals & Setup Guide, use the page’s specific product or problem as the starting point rather than a generic Portfolio Lighting rule. Preserve the exact model or item number when available, document the failed component or symptom, and record the dimensions, ratings, mounting details, and connections that control the repair decision. That evidence makes it possible to distinguish identification, diagnosis, parts matching, and complete replacement instead of treating them as the same task. Continue with Portfolio Parts once the problem has been narrowed.
Looking for help with a specific Portfolio lighting fixture? Our guides below can help you identify models, download manuals, troubleshoot problems, and find replacement parts for discontinued Portfolio lighting products.
Answer the first question that matches your project and follow the recommended path.
Start with transformer size, cable routing, fixture spacing, and connector protection.
Outdoor setup pathIdentify the model first so you do not buy the wrong mounting hardware, bulb, shade, or connector.
Use model lookupLook for manuals, PDF instruction sheets, wiring diagrams, and model-specific setup notes.
Find manualsCheck power, transformer output, wiring, bulb, socket, connector, and timer settings.
Troubleshoot installationFind replacement glass, globes, stakes, brackets, transformers, connectors, bulbs, and hardware.
Find replacement partsReview GFCI, junction box, burial depth, grounding, transformer mounting, and permit issues.
Check code safetyA newly installed system should be tested during actual startup, not only after every fixture is illuminated. Simultaneous energization can expose transformer surge, weak connections, marginal cable sizing, or switching devices that cannot tolerate the connected LED-driver load. The landscape lighting peak-load database provides a startup inspection method for evaluating current pulses, voltage sag, fixture retries, and control-device stress.
One of the biggest reasons an installation becomes frustrating is that the planning happens too late. Before installing Portfolio lights, it helps to think through the purpose of the lighting, the size of the area, the style of fixture you want, and where the light should actually go. A little planning upfront often prevents wasted time later.
My workflow during installation is always hands-on and step-by-step. I’ve learned that skipping even one small step can create bigger problems later on.
Taking time to plan the lighting layout also helps ensure the fixtures provide the right amount of brightness and coverage for the space. Portfolio lighting instructions often recommend thinking about placement, spacing, and beam direction before installation begins, especially for outdoor and landscape lighting systems.
When I strip wires and make connections, I physically tug on each wire after securing it. I’ve seen connections look tight but fail under slight movement, which can cause flickering or total failure later.
For example, path lights may need even spacing along a walkway, while spotlights or accent lights may need to be positioned to highlight specific features like trees, walls, or garden areas. By reviewing the instructions and planning the layout in advance, homeowners can create a lighting setup that looks better, functions properly, and avoids the need to reposition fixtures after installation.
If you remember anything after reading this guide, a connection isn’t done until it’s tested.
Installing lighting fixtures is easier when you understand how different lighting systems are designed and connected. Indoor lighting, outdoor fixtures, low voltage landscape lighting systems, and LED installations all follow similar principles of wiring, placement, and system planning. For a broader overview of how these systems work together, see the complete lighting guide, which explains lighting layouts, installation basics, troubleshooting, and replacement components used across residential lighting systems.
Installation matters even more when the lighting system includes advanced controls. Spoken commands only work well when the zones, scenes, and controller settings are organized properly from the start. For the control side of that setup, visit AI voice lighting logic.
Before installing a new system, review the solar vs low voltage energy efficiency guide to determine which setup makes the most sense for your yard and power availability.
If you are installing or repairing your system and suspect cable damage, follow the Portfolio lighting wire replacement guide for detailed steps on cutting, splicing, and protecting low-voltage wire.
Portfolio lighting instructions are useful because different fixtures install in very different ways. A recessed light is not installed like a pendant. A track lighting system is not mounted like a wall sconce. Outdoor transformer-based fixtures have different needs than a decorative indoor fixture mounted to an electrical box.
Many homeowners search for Portfolio lighting instructions when installing a new fixture, replacing an older light, or troubleshooting a system that is not working correctly. Having the correct installation guide or instruction sheet makes the process much easier because it explains wiring connections, mounting hardware, bulb compatibility, and safety steps for each specific fixture type.
Portfolio lighting manuals are especially helpful for outdoor systems such as landscape lighting and transformers, where proper wiring and placement can affect both performance and safety. Using the right instructions helps ensure the fixture is installed correctly and that the lighting system works the way it was designed.
When installing or replacing Portfolio lighting fixtures, confirming the model number can help you find the correct instructions, compatible bulbs, and replacement components. Our Portfolio lighting model number lookup guide provides a quick reference for identifying many of the most common Portfolio lighting models.
If you are installing an indoor fixture and want to compare how different fixture types are typically used in a home, our Portfolio indoor lighting guide is a helpful next stop. It covers the main indoor lighting categories on the site and explains where fixtures like recessed lights, pendants, chandeliers, wall lights, and track lighting usually work best. That can make it easier to match the installation project with the right type of fixture for the room.
Wall-mounted security lights require proper mounting height, wiring practices, and sensor positioning to perform correctly. Motion-detection coverage can vary significantly depending on fixture placement and surrounding obstructions. Homeowners installing or replacing a Portfolio PF-4300-BK fixture can review our PF-4300-BK motion-sensing porch light guide for setup recommendations, adjustment information, and installation considerations.
A clean Portfolio Lighting installation should be planned not only for appearance but also for future repair, inspection, control upgrades, and weather resistance. If smart controls, dimming modules, sensors, or low-voltage signal wires are part of the project, the NEC Article 725 smart lighting control guide explains how Class 2-style control circuits differ from lighting load wiring. If you are replacing or extending an older outdoor lighting setup, the outdoor lighting grandfather clause guide helps clarify when old work can remain and when new work may trigger current safety requirements. If the fixture is already showing fogging or trapped moisture, the Portfolio lighting foggy lens condensation guide explains why gasket condition, lens seating, drainage, and wet-location sealing should be checked before installation is considered complete.
Why it matters: Helps the fixture sit securely, align correctly, and avoid movement after installation.
Best resource: Instruction sheet or fixture manual
Why it matters: Ensures the fixture is connected safely and correctly before power is restored.
Best resource: Manual and electrical instructions
Why it matters: Improves light placement before installation and prevents having to move fixtures later.
Best resource: Room layout and installation guide
Why it matters: Helps identify wiring, transformer, timer, connector, or bulb problems if the light does not work.
Best resource: Troubleshooting guide and manual
Why it matters: Important for transformers, low-voltage cable, moisture exposure, and long-term reliability.
Best resource: Outdoor instruction sheets and repair PDFs
If your installation includes longer wire runs or multiple lighting zones, a multi-tap transformer requires a different wiring approach. This Portfolio 200W multi-tap transformer wiring guide explains how to connect the COM terminal, choose the correct voltage tap, and maintain consistent brightness across your system.
For outdoor installs involving splices, conduit, or fixture connections, check our outdoor lighting junction box requirements before closing up the wiring.
Before installing outdoor Portfolio lighting, verify whether your setup requires a permit using the low voltage lighting permit requirements guide.
Use this guide to quickly compare common Portfolio lighting installation projects before you start wiring, mounting, or buying parts.
Best for: Adding or replacing walkway lights.
Check first: Fixture spacing, cable route, and transformer wattage.
View low-voltage guide →Best for: Highlighting trees, walls, signs, or landscape features.
Check first: Beam aim, connector quality, and voltage drop.
View landscape guide →Best for: Replacing or upgrading the outdoor power pack.
Check first: Total wattage, GFCI outlet, timer, and photocell setup.
View transformer guide →Best for: Replacing ceiling lights, pendants, and flush mounts.
Check first: Power shutoff, box support, grounding, and fixture weight.
View grounding guide →Best for: Fan/light combinations with remotes or receivers.
Check first: Fan-rated box, blade clearance, receiver wiring, and controls.
View ceiling fan guide →Best for: Recessed lighting, new wiring paths, or permanent fixture changes.
Check first: Lighting code compliance requirements, box access, wiring path, and fixture rating.
View code safety guide →For Portfolio Lighting Installation Instructions, Wiring Diagrams, Manuals & Setup Guide, use the page’s specific product or problem as the starting point rather than a generic Portfolio Lighting rule. Preserve the exact model or item number when available, document the failed component or symptom, and record the dimensions, ratings, mounting details, and connections that control the repair decision. That evidence makes it possible to distinguish identification, diagnosis, parts matching, and complete replacement instead of treating them as the same task. Continue with Portfolio Parts once the problem has been narrowed.
The fixture type plays a major role in how the installation should go. It also changes the planning stage. Some fixtures are meant to direct light, some are decorative, and some are designed to blend quietly into the room or landscape.
Before installing or reconnecting wiring, confirm your model using the Portfolio Lighting model library and repair index .
I’ve worked with mounting hardware that looked solid at first but shifted once the fixture weight was applied. In my experience, proper support is just as important as correct wiring.
If it moves now, it will fail later.
I remember installing a ceiling fixture where the mounting bracket was slightly loose. When I tightened everything fully and checked alignment again, the fixture sat correctly and avoided long-term stress on the wiring.
Ceiling fans require a different installation mindset than standard light fixtures because the electrical box, mounting bracket, blade clearance, downrod length, controls, and light kit all affect safety and performance. If you are working with an older Portfolio fan or replacing one with a modern equivalent, review the Portfolio ceiling fans guide before installation so you can check room size, ceiling height, airflow needs, lighting options, and control compatibility before taking the fixture apart.
Track lighting is a practical choice when you need flexible, directional lighting that can be adjusted to highlight specific areas of a room. It works especially well in kitchens, workspaces, hallways, and other areas where focused light improves visibility and functionality.
Recessed lights are often chosen when homeowners want a cleaner ceiling line and less visible hardware. They are useful for general lighting and for highlighting selected areas without a bulky fixture.
Pendant fixtures are commonly used in spaces where the lighting also needs to contribute to the design of the room. Islands, dining spaces, and decorative entry areas are common examples.
Wall sconces are a versatile lighting option that can provide soft ambient light while also enhancing the look of vertical spaces in a room. They are commonly used in hallways, bedrooms, living areas, and entryways where wall-mounted lighting can improve visibility without taking up floor or ceiling space.
Outdoor Portfolio lighting usually involves more planning around cable runs, transformer location, fixture spacing, and weather exposure. Landscape and transformer-based systems are often low voltage, which changes both the installation process and the troubleshooting steps later.
If you are installing new fixtures or switching brands, review the LeonLite vs Portfolio landscape lighting comparison to understand wiring, compatibility, and installation differences before starting.
Underwater pool lights require proper bonding, GFCI protection, waterproof conduit routing, and compatible wet niche hardware. Our Portfolio Swimming Pool Lighting Guide explains the most common installation and replacement issues found in older Portfolio pool lighting systems.
Every model is different, but most Portfolio lighting installations follow a similar pattern. The exact order depends on the fixture, yet the basic process is usually the same: plan the location, shut off power, review the manual, mount the hardware, connect wiring, secure the fixture, and test the final result.
If a fixture does not power on after installation, the issue is often related to a damaged connector, transformer problem, missing bulb, or another failed component. In those situations it can help to check Portfolio lighting replacement parts before replacing the entire fixture.
Outdoor and landscape lighting should be adjusted after installation to achieve the desired illumination. This is an important step because many fixtures need a final positioning check once power is turned back on to confirm the light spread and direction are correct.
Choosing the right bulb color makes a big difference in how your landscape lighting looks at night. This landscape lighting color temperature guide explains how to select warm or cool tones to match your home, improve visibility, and avoid harsh lighting.
For wiring and installation details specific to models 284369, TC001, and 284357, use the model manuals and parts guide.
Most installation problems come from planning and wiring issues, not the fixture itself. Taking time to check these steps can prevent having to redo the installation later.
If the transformer connections become loose or damaged during installation, use our terminal block and lug repair guide to restore a secure connection.
If your fixture is missing the mounting bracket, crossbar, or screws, use our Portfolio lighting mounting hardware and bracket replacement guide to identify the correct parts before continuing installation.
For larger systems with multiple zones, balancing the electrical load becomes more important. This AI transformer voltage load balancing guide explains how advanced systems manage power more efficiently and reduce overload issues across your lighting layout.
To ensure your setup meets basic safety and code expectations, review landscape lighting electrical code and safety guide before finalizing installation.
During installation, grounding and bonding must be completed correctly to prevent shock hazards. See our landscape lighting grounding and bonding guide for step-by-step safety guidance.
If the light does not work after installation, the problem is usually one of these failure points—not the entire fixture.
Usually transformer overload, thermal protection, timer settings, or a failing power pack.
Check transformer issuesUsually a bulb, socket, connector, splice, or fixture lead problem.
Troubleshoot one lightUsually voltage drop from long cable runs, undersized wire, or too many fixtures on one run.
Check voltage dropUsually moisture, damaged cable, improper outdoor connection, or line-voltage wiring issue.
Review GFCI rulesUsually incorrect programming, photocell conflict, reset issue, or failed transformer controls.
Fix timer setupSafety during Portfolio lighting installation is important because most lighting projects involve working with electrical connections, mounting hardware, and fixtures that must be installed correctly to operate safely. Whether you are installing an indoor ceiling light, a wall fixture, or a low-voltage outdoor lighting system, following proper installation steps helps prevent wiring problems, electrical hazards, and damage to the fixture.
Before completing installation, confirm that your outdoor outlet or circuit meets GFCI protection requirements for safe operation.
Portfolio lighting instructions typically include safety guidelines such as turning off power at the breaker, checking wire connections, using the correct mounting hardware, and confirming that the fixture is compatible with the existing electrical box or transformer.
In my career, I’ve learned that safety steps are not optional. I’ve seen installs where rushing led to crossed wires or improper grounding, which could have caused serious issues.
When I’m working on a system, I slow down during wiring and mounting. I’ve found that taking a few extra minutes to double-check everything prevents hours of troubleshooting later.
Slow is smooth. Smooth is safe.
Proper grounding is critical for safe installation. If you are unsure whether your fixture is grounded correctly, see our Portfolio light fixture not grounded guide to understand risks, symptoms, and how to fix grounding issues.
Proper installation should also include protection against voltage spikes. See the landscape lighting surge protection guide for recommended surge protection setup.
These are the small installation checks that prevent many repeat failures after the light is already mounted.
Indoor Portfolio lighting usually focuses on fixture selection, placement, electrical box connection, and room layout. Outdoor installation often adds more variables such as transformers, low voltage cable, connector placement, weather exposure, and the need to space fixtures across a larger area.
Good installation starts with a solid plan. Before running wires or installing fixtures, this room-by-room lighting plan guide helps you map out each space so your installation process is smoother and more efficient.
If you are replacing a handheld remote or installing a new receiver inside the canopy, our Portfolio ceiling fan remote replacement guide walks through dip switch locations, receiver placement, and the most reliable pairing steps.
Outdoor Portfolio lighting installation also requires more planning because the lighting system often covers larger areas such as walkways, gardens, patios, and driveways. Installers may need to route low-voltage cable, position transformers near a power source, and carefully place connectors so the system remains protected from weather and moisture.
Following Portfolio lighting instructions for outdoor setups helps ensure the fixtures are spaced correctly, the wiring is secure, and the entire landscape lighting system operates reliably throughout the year.
Installation is one of the biggest factors in total outdoor lighting cost. This landscape lighting cost guide explains how labor, wiring, and setup can impact your overall budget.
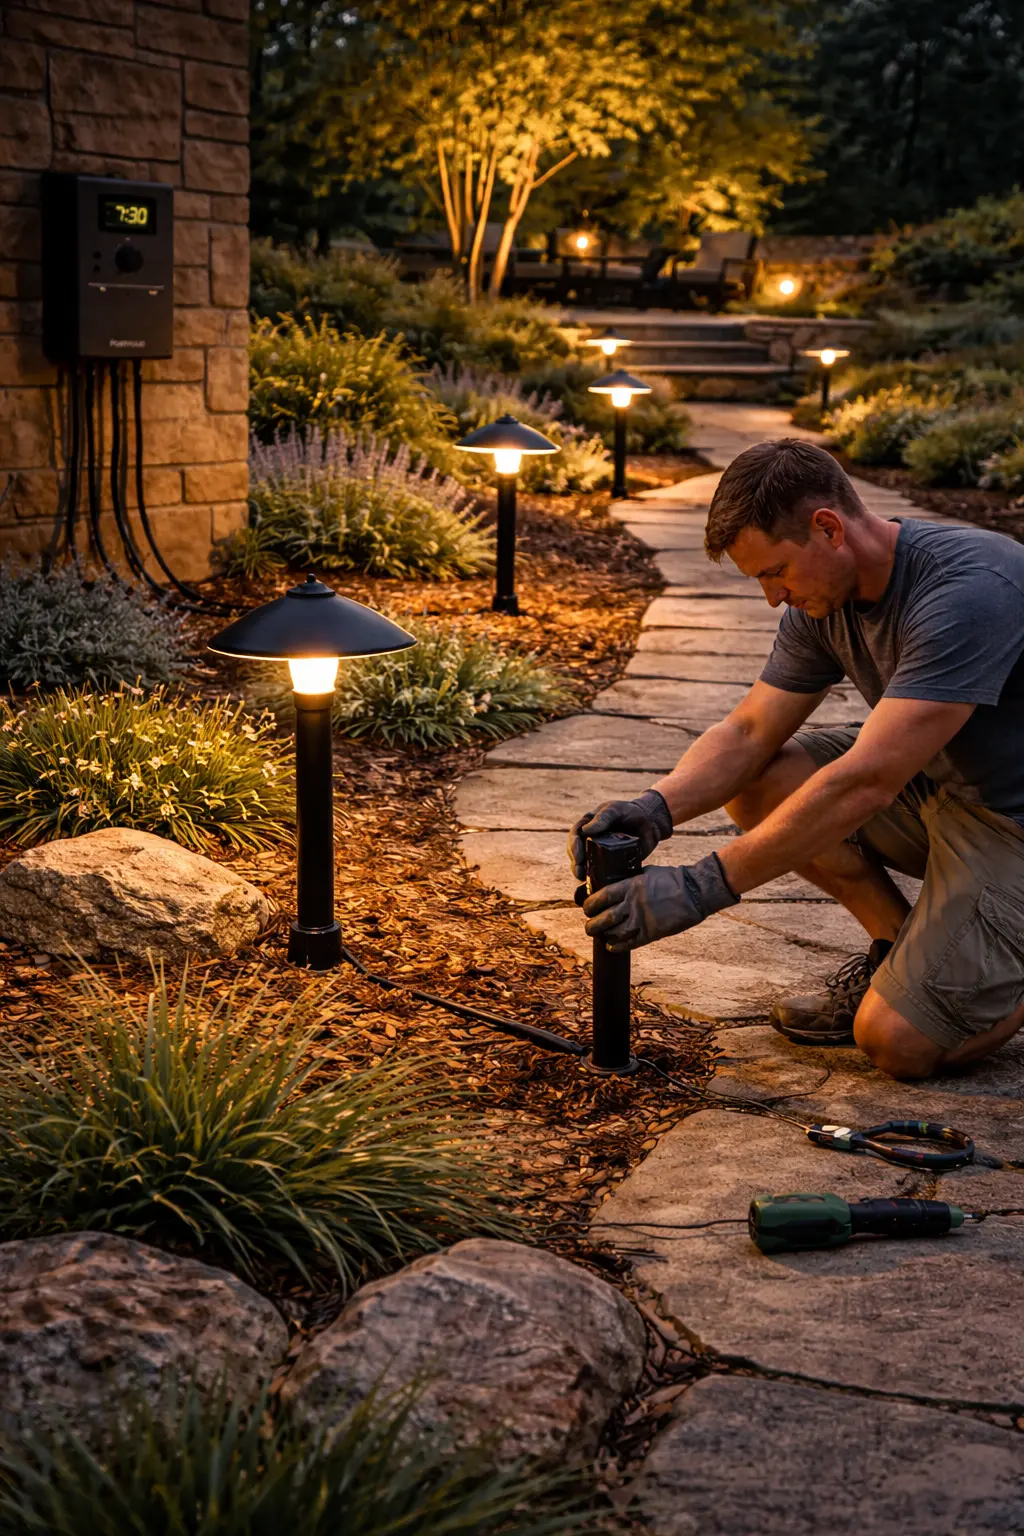
Landscape systems often require transformer placement, cable routing, and fixture spacing in addition to the normal setup steps.
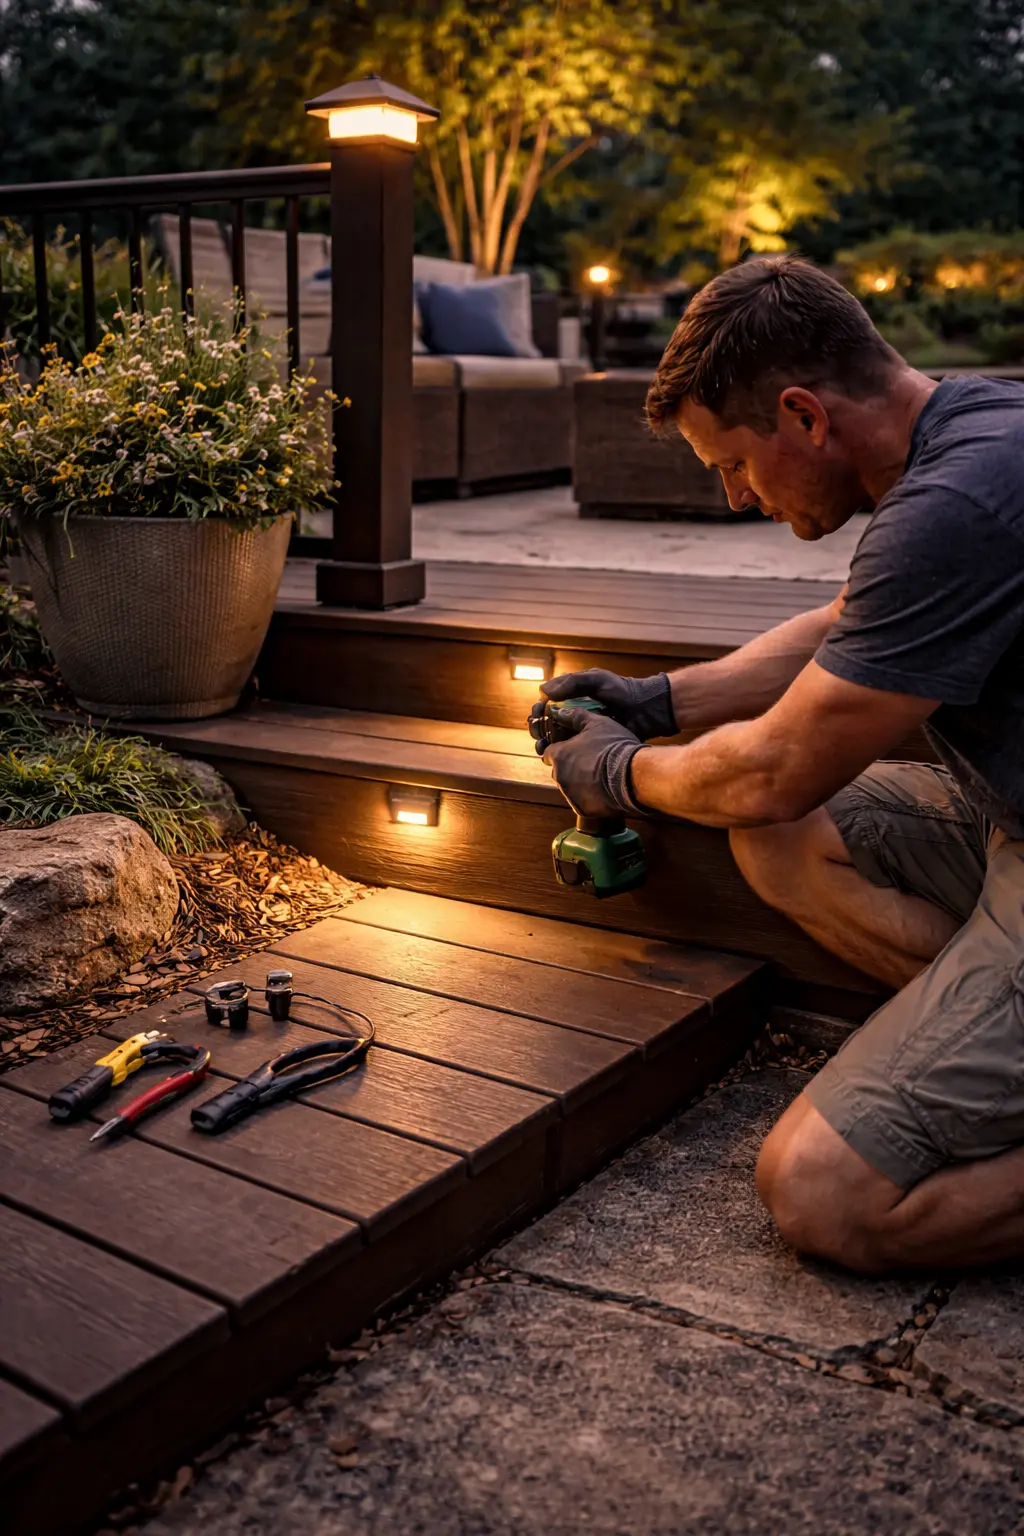
Outdoor living spaces benefit from careful placement and safe installation planning before permanent mounting begins.

Good lighting is not just wiring. It also depends on aim, spacing, and choosing the right effect for the area.
Portfolio manuals, PDF guides, and instruction sheets are valuable resources for homeowners installing, repairing, or troubleshooting Portfolio lighting fixtures. These documents typically include step-by-step installation instructions, wiring diagrams, mounting details, and safety information that help ensure each light is installed correctly.
Whether someone is working with indoor ceiling lights, wall fixtures, or low-voltage outdoor lighting systems, having the correct Portfolio lighting manual can make the process much easier. Many instruction sheets also provide model numbers, parts lists, and troubleshooting tips, which helps users identify the right components and keep their Portfolio lighting system working properly.
Once your system is installed and working properly, you can take it further with smart automation. This AI automated landscape lighting guide shows how to add scheduling, adaptive lighting, and system intelligence to improve performance and convenience.
Before installing or upgrading outdoor lighting, review NEC 2026 landscape lighting code updates to understand current requirements.
Browse printable manuals and PDF instruction resources that may help identify fixture-specific installation steps.
Helpful if you are working on an outdoor installation and want a printable instruction format for reference.
A useful example of repair-oriented installation support for an outdoor Portfolio transformer-style system.
For Portfolio Lighting Installation Instructions, Wiring Diagrams, Manuals & Setup Guide, use the page’s specific product or problem as the starting point rather than a generic Portfolio Lighting rule. Preserve the exact model or item number when available, document the failed component or symptom, and record the dimensions, ratings, mounting details, and connections that control the repair decision. That evidence makes it possible to distinguish identification, diagnosis, parts matching, and complete replacement instead of treating them as the same task. Continue with Portfolio Parts once the problem has been narrowed.
Some homeowners explore smart lighting options, dimmer switches, or simpler control systems when upgrading their lighting. That can be a practical approach because not every lighting improvement requires adding more hardware or rewiring fixtures.
In some situations, switching to smart bulbs or using dimmer-compatible lighting can make it much easier to control brightness, schedules, and overall lighting behavior without complicating the installation.
If your system is installed but still relies on a basic timer, you can upgrade it without replacing everything. See how to make landscape lighting smart using simple control upgrades that work with existing transformers.
My recommendation is to test everything before calling the job done. I’ve installed systems that looked perfect, but when I powered them on, small issues showed up immediately.
When I walk through the system after installation—checking brightness, spacing, and operation—I catch things that would have been missed otherwise. In my experience, that final check is what separates a clean install from a frustrating one.
Always test before you finish.
Fix common problems with bulbs, sockets, transformers, timers, dim lights, and wiring after installation.
Read the guideLearn more about directional lighting, replacement heads, and installation considerations for track fixtures.
Read the guideExplore recessed lighting uses, fixture types, and why homeowners choose it for cleaner ceiling lighting.
Read the guideSee decorative installation ideas and guidance for pendant fixtures in kitchens, entries, and dining areas.
Read the guideHelpful for wall-mounted fixture ideas, ambient lighting, and decorative vertical surface lighting.
Read the guideRead more about transformer placement, low voltage cable, path lights, and outdoor installation planning.
Read the guideIn many cases, yes. Users often search for instruction sheets, manuals, and PDF guides when they need model-specific installation help or replacement copies.
Plan the purpose of the light, measure the space, review the manual, and make sure the power is turned off before beginning any wiring or mounting work.
Many homeowners handle DIY installation successfully, especially when they follow the manual carefully and take their time with layout, mounting, and safety checks.
Manuals, printable guides, instruction sheets, and repair PDFs are often the most useful next step when a user needs installation help for a specific model.
Portfolio lighting installation usually goes best when the work starts with planning instead of guesswork. Choosing the right fixture, reading the manual carefully, thinking through the placement, and following safe wiring practices can make a major difference in both the installation experience and the final look of the lighting.
Whether you are installing track lighting, recessed lights, pendants, sconces, or outdoor low voltage fixtures, good instructions matter. A clear manual, the right PDF guide, and a careful installation process can turn a frustrating project into a clean and professional-looking result.
If an installed holiday strand has one working section and one dead section, use our troubleshooting guide for Christmas lights half out to diagnose the failure before reinstalling or replacing it.
Every technical guide on PortfolioLighting.net is reviewed for accuracy. My troubleshooting procedures are based on 25+ years of field experience and are published by PortfolioLighting.net to ensure accuracy and electrical safety compliance especially in an ever-changing lighting landscape.
Get landscape lighting troubleshooting tips, maintenance advice, wiring guides, product updates, and outdoor lighting inspiration.
Follow Us on Facebook