
Match this repair to your Portfolio Lighting model
If you are working with an older Portfolio fixture, use the Landscape Lighting Spacing: How Far Apart Lights Should Be information to identify the part or repair method—but confirm the exact model, dimensions, lamp type and electrical rating first. Similar-looking Portfolio and third-party components are not automatically interchangeable.
Portfolio owner’s first step: Photograph the fixture and model label, compare measurements, then use the Portfolio parts and repair guides to narrow the replacement.
Quick Answer: Standard Landscape Lighting Spacing Matrix
Landscape fixture spacing relies on calculating a precise overlapping photometric footprint rather than picking an arbitrary distance. Proper spacing prevents harsh glare fields and alternating blind spots along your outdoor corridors.
To establish a clean visual baseline, your primary perimeter lighting layout should align with these four fundamental spacing standards:
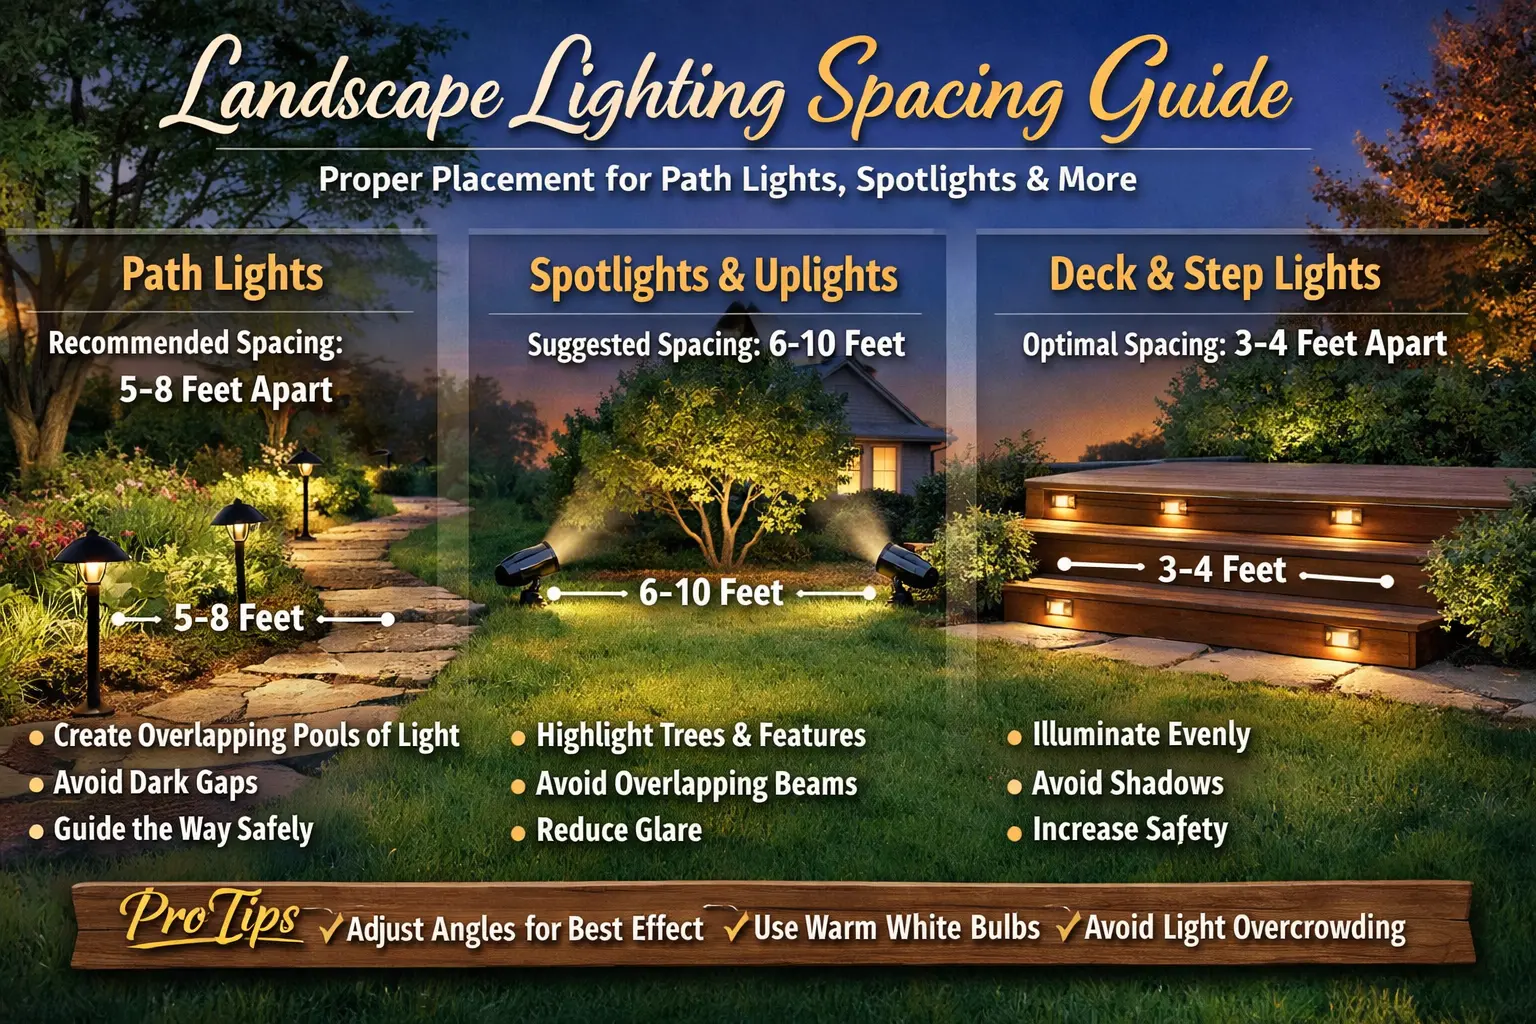
- Walkway Guidance Corridors (Path Lights): Spaced 6 to 10 feet apart in an alternating, staggered pattern; placing fixtures too close creates an artificial, blinding "runway effect."
- Vehicle Transit Zones (Driveway Lights): Spaced 8 to 12 feet apart outside the direct path of tires; requires a tight downward beam angle to ensure maximum concrete edge definition.
- Foliage & Architectural Features (Accent Spots): Spaced 1 to 6 feet away from the base of target objects; utilizes concentrated 15° to 35° shroud angles to control directional depth.
- Masonry Steps & Retaining Walls (Hardscape Pucks): Spaced 18 to 24 inches apart horizontally; requires direct underside mounting to project a soft, uniform safety wash.
Advanced Layout Sizing & Voltage Variables
While basic dimensional footings give you a visual starting point, a truly permanent outdoor system requires adjustments based on your active circuit capacity and mechanical properties.
- Tight Grade Curves & Structural Elevation Changes: Demands condensing standard path spacing down to 3 to 5 feet to safely illuminate sudden stone step drops.
- High-Output Lumen Compensations: Modern commercial-grade LED heads radiating over 300 lumens require widening your layout margins up to 14 feet to prevent blinding hot spots.
- Line Resistance Spacing Drops: Fixture intervals must adjust to match the underlying cable length; runs stretching past 100 feet require thick 12-gauge or 10-gauge wire lines to keep final bulbs from dimming.
⚠️ CRITICAL RUNWAY ERRORS: Setting your fixture intervals based purely on tape measurements without running a digital multimeter line-load test will drop your circuit loop below 10.8V. This triggers three severe structural system failures detailed in our design blueprints below.
Before digging trenches or ordering expansion hardware, verify your yard's geometric boundaries. Use our specific layout blueprints below to match your exact home architecture to a balanced, code-compliant spacing diagram.
Landscape Lighting Spacing Chart
Use this quick spacing chart as a starting point before placing fixtures. The right distance depends on brightness, beam spread, path width, and how much overlap you want between pools of light.
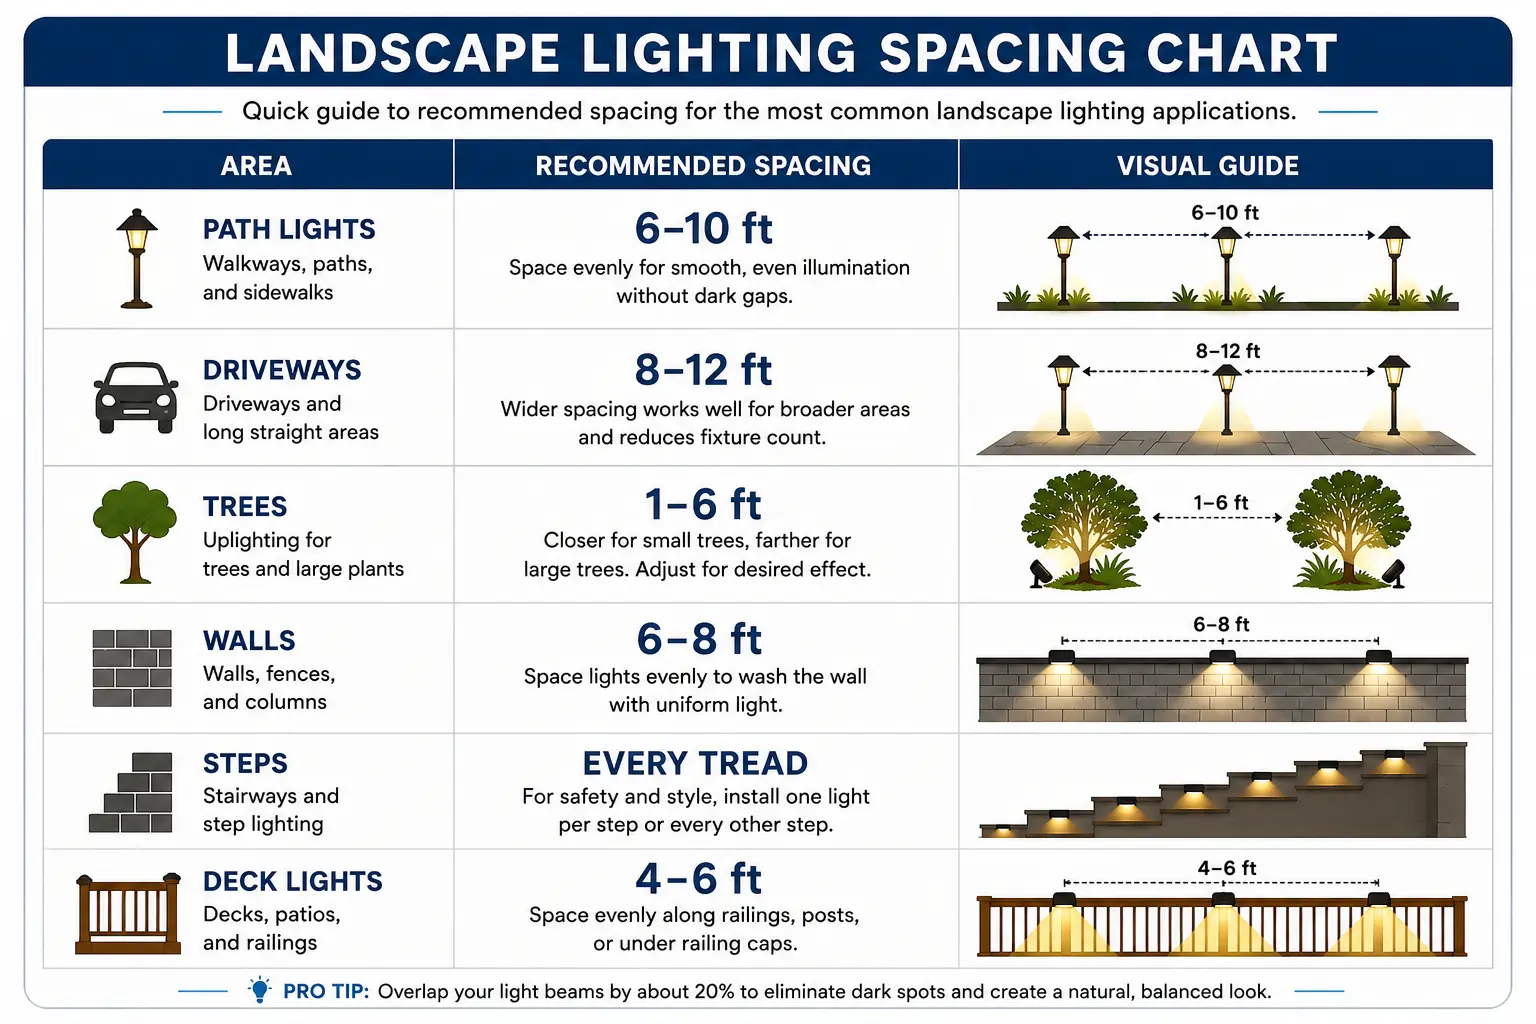
Chart: Recommended landscape lighting spacing for common outdoor areas. Path lights usually work best 6–10 feet apart, driveway lights 8–12 feet apart, wall lights 6–8 feet apart, and deck lights 4–6 feet apart.
How to use the spacing chart
Start with the recommended range, then adjust after a nighttime test. If the ground has dark gaps between fixtures, move the lights closer together or use a wider beam. If the area looks harsh, bright, or lined up like a runway, move the lights farther apart or reduce fixture brightness.
Best rule for most homeowners
Do not space landscape lights by measurement alone. Space them by overlap. A good layout creates soft, connected pools of light without making every fixture obvious from the street.
Match the replacement to the actual Portfolio model
On Landscape Lighting Spacing: How Far Apart Lights Should Be, diagnose the installation by failure scope before replacing hardware. One dark fixture points first to that fixture, its lamp/module, local splice, stake, or short lead; several fixtures on one run shift attention upstream to the branch connection and cable; a whole-yard outage shifts the investigation to the transformer, controls, and source power. Preserve fixture model numbers and connector locations as you work so a repair does not erase the evidence needed for later parts matching. Continue with Portfolio Parts when the failure has been narrowed.
Landscape Path Light Calculator
Estimate how many path lights you need based on walkway length and spacing.
Recommended Lights
Real-World Landscape Lighting Spacing Examples
Use these examples to turn the spacing rules into an actual fixture plan. The numbers below assume low-voltage LED fixtures and a simple residential layout.
| Project | Suggested Fixture Count | Spacing | Estimated Watts | Transformer Size | Suggested Cable |
|---|---|---|---|---|---|
| 20-foot sidewalk | 4 path lights | 6–7 ft | 8–16W total | 45W or larger | 16/2 or 14/2 |
| 40-foot sidewalk | 6 path lights | 7–8 ft | 12–24W total | 60W or larger | 14/2 preferred |
| 75-foot curved sidewalk | 10–12 path lights | 6–8 ft | 20–48W total | 100W or larger | 12/2 preferred |
| 150-foot driveway | 14–18 fixtures | 8–12 ft | 42–90W total | 150W+ with load margin | 12/2, split into zones if needed |
The longer the run, the more spacing becomes an electrical decision instead of just a design decision. Long cable runs usually need heavier cable, better connector planning, and transformer headroom.
Who This Guide Is For
- Homeowners installing path or driveway lighting
- DIY users planning low-voltage systems
- Anyone fixing uneven or patchy lighting
The goal of landscape light spacing is not just covering distance. It is creating balanced, useful light that guides movement, highlights the right features, and avoids the harsh look that comes from placing fixtures too close together.
In a well-planned yard, spacing decisions usually vary by fixture type. Path lights follow one kind of spacing rule, driveway lights follow another, and accent lights are positioned based on beam spread, feature size, and how much emphasis you want after dark.
Spacing is one of the most important parts of a well balanced lighting design, but it works best when considered within the full lighting plan. Our Complete Landscape Lighting Guide explains how fixture spacing fits into landscape lighting layout, path light placement, accent lighting, wiring, transformer planning, and overall outdoor lighting system design.
If you are planning your full system, start with our landscape lighting layout guide.
Most homeowners adjust spacing once or twice after testing at night—this is normal and part of getting the best result.
When spacing is correct, the path feels naturally guided without visible light sources dominating the view.
Optimal Fixture Spacing Guide
| Project Type | Avg. Spacing | Layout Strategy | Key Goal |
|---|---|---|---|
| Path Lighting | 6–10 Feet | Staggered (Zig-Zag) | Avoid "runway" look; ensure safe footing. |
| Tree Uplighting | 1–6 Feet | Base-to-Trunk | Highlight texture and canopy volume. |
| Wall Washing | 6–8 Feet | Parallel to Wall | Even light spread without harsh hot spots. |
| Hardscape Glow | 18–24 Inches | Under-Cap Lip | Continuous "glow line" for steps or walls. |
How to Choose the Right Spacing
Use closer spacing if your lights are dim or the area is tight. Use wider spacing if the lights are bright or the area is open.
- Dim lights → closer spacing
- Bright lights → wider spacing
- Narrow beam → tighter placement
- Wide beam → more spread
If your system has been expanded over time, wiring may become stressed or damaged. Before adjusting spacing, check your cable condition using the Portfolio lighting wire replacement guide to ensure the system is functioning properly.
Senior-safe layouts require more than evenly spaced fixtures. Visit the Senior Path Lighting Design Guide to learn how contrast ratios, glare control and visual transition zones affect outdoor walking safety for older adults.
Spacing alone does not determine how a yard looks at night; lumen output changes the entire effect. The landscape fixture lumen comparison guide helps match brightness to spacing so the layout does not look too dim or too harsh.
Before and After: Bad Spacing vs Correct Spacing
Too Close: 4 Feet Apart
What goes wrong:
- Harsh glare along the walkway
- Wasted fixtures and higher project cost
- Airport runway appearance
- Bright hot spots instead of soft guidance
Correct: About 8 Feet Apart
Why it works better:
- Smoother pools of light
- Lower fixture count
- Less glare for people walking the path
- More natural-looking landscape lighting
The best spacing is usually the distance where the path feels safely visible without each fixture becoming the main thing you notice.
Path Light Spacing
When homeowners search for how far apart landscape lights should be, path light spacing is usually the first thing they want to know. In most residential systems, path lights are spaced around 6 to 10 feet apart, depending on fixture brightness, beam spread, path width, and the overall look you want.
A Good Starting Range
A 6-to-10-foot range works well because it usually gives enough overlap for visibility without making the path feel crowded. Smaller fixtures or dimmer lights may need to be closer together. Brighter fixtures often allow wider spacing.
Alternate Sides Instead of Mirroring Every Light
Alternating lights along a path often creates a more natural appearance than placing fixtures directly across from each other. That approach usually feels softer and less mechanical while still guiding the eye clearly. For more detailed examples, see path light placement.
Path Light Spacing Diagram for Landscape Lighting
Proper path light spacing is one of the easiest ways to make a landscape lighting system look professional. When fixtures are placed too close together, the walkway can look overlit and harsh. When they are placed too far apart, the path can look uneven and leave dark gaps. A balanced spacing plan helps create a clean, welcoming look without wasting fixtures.
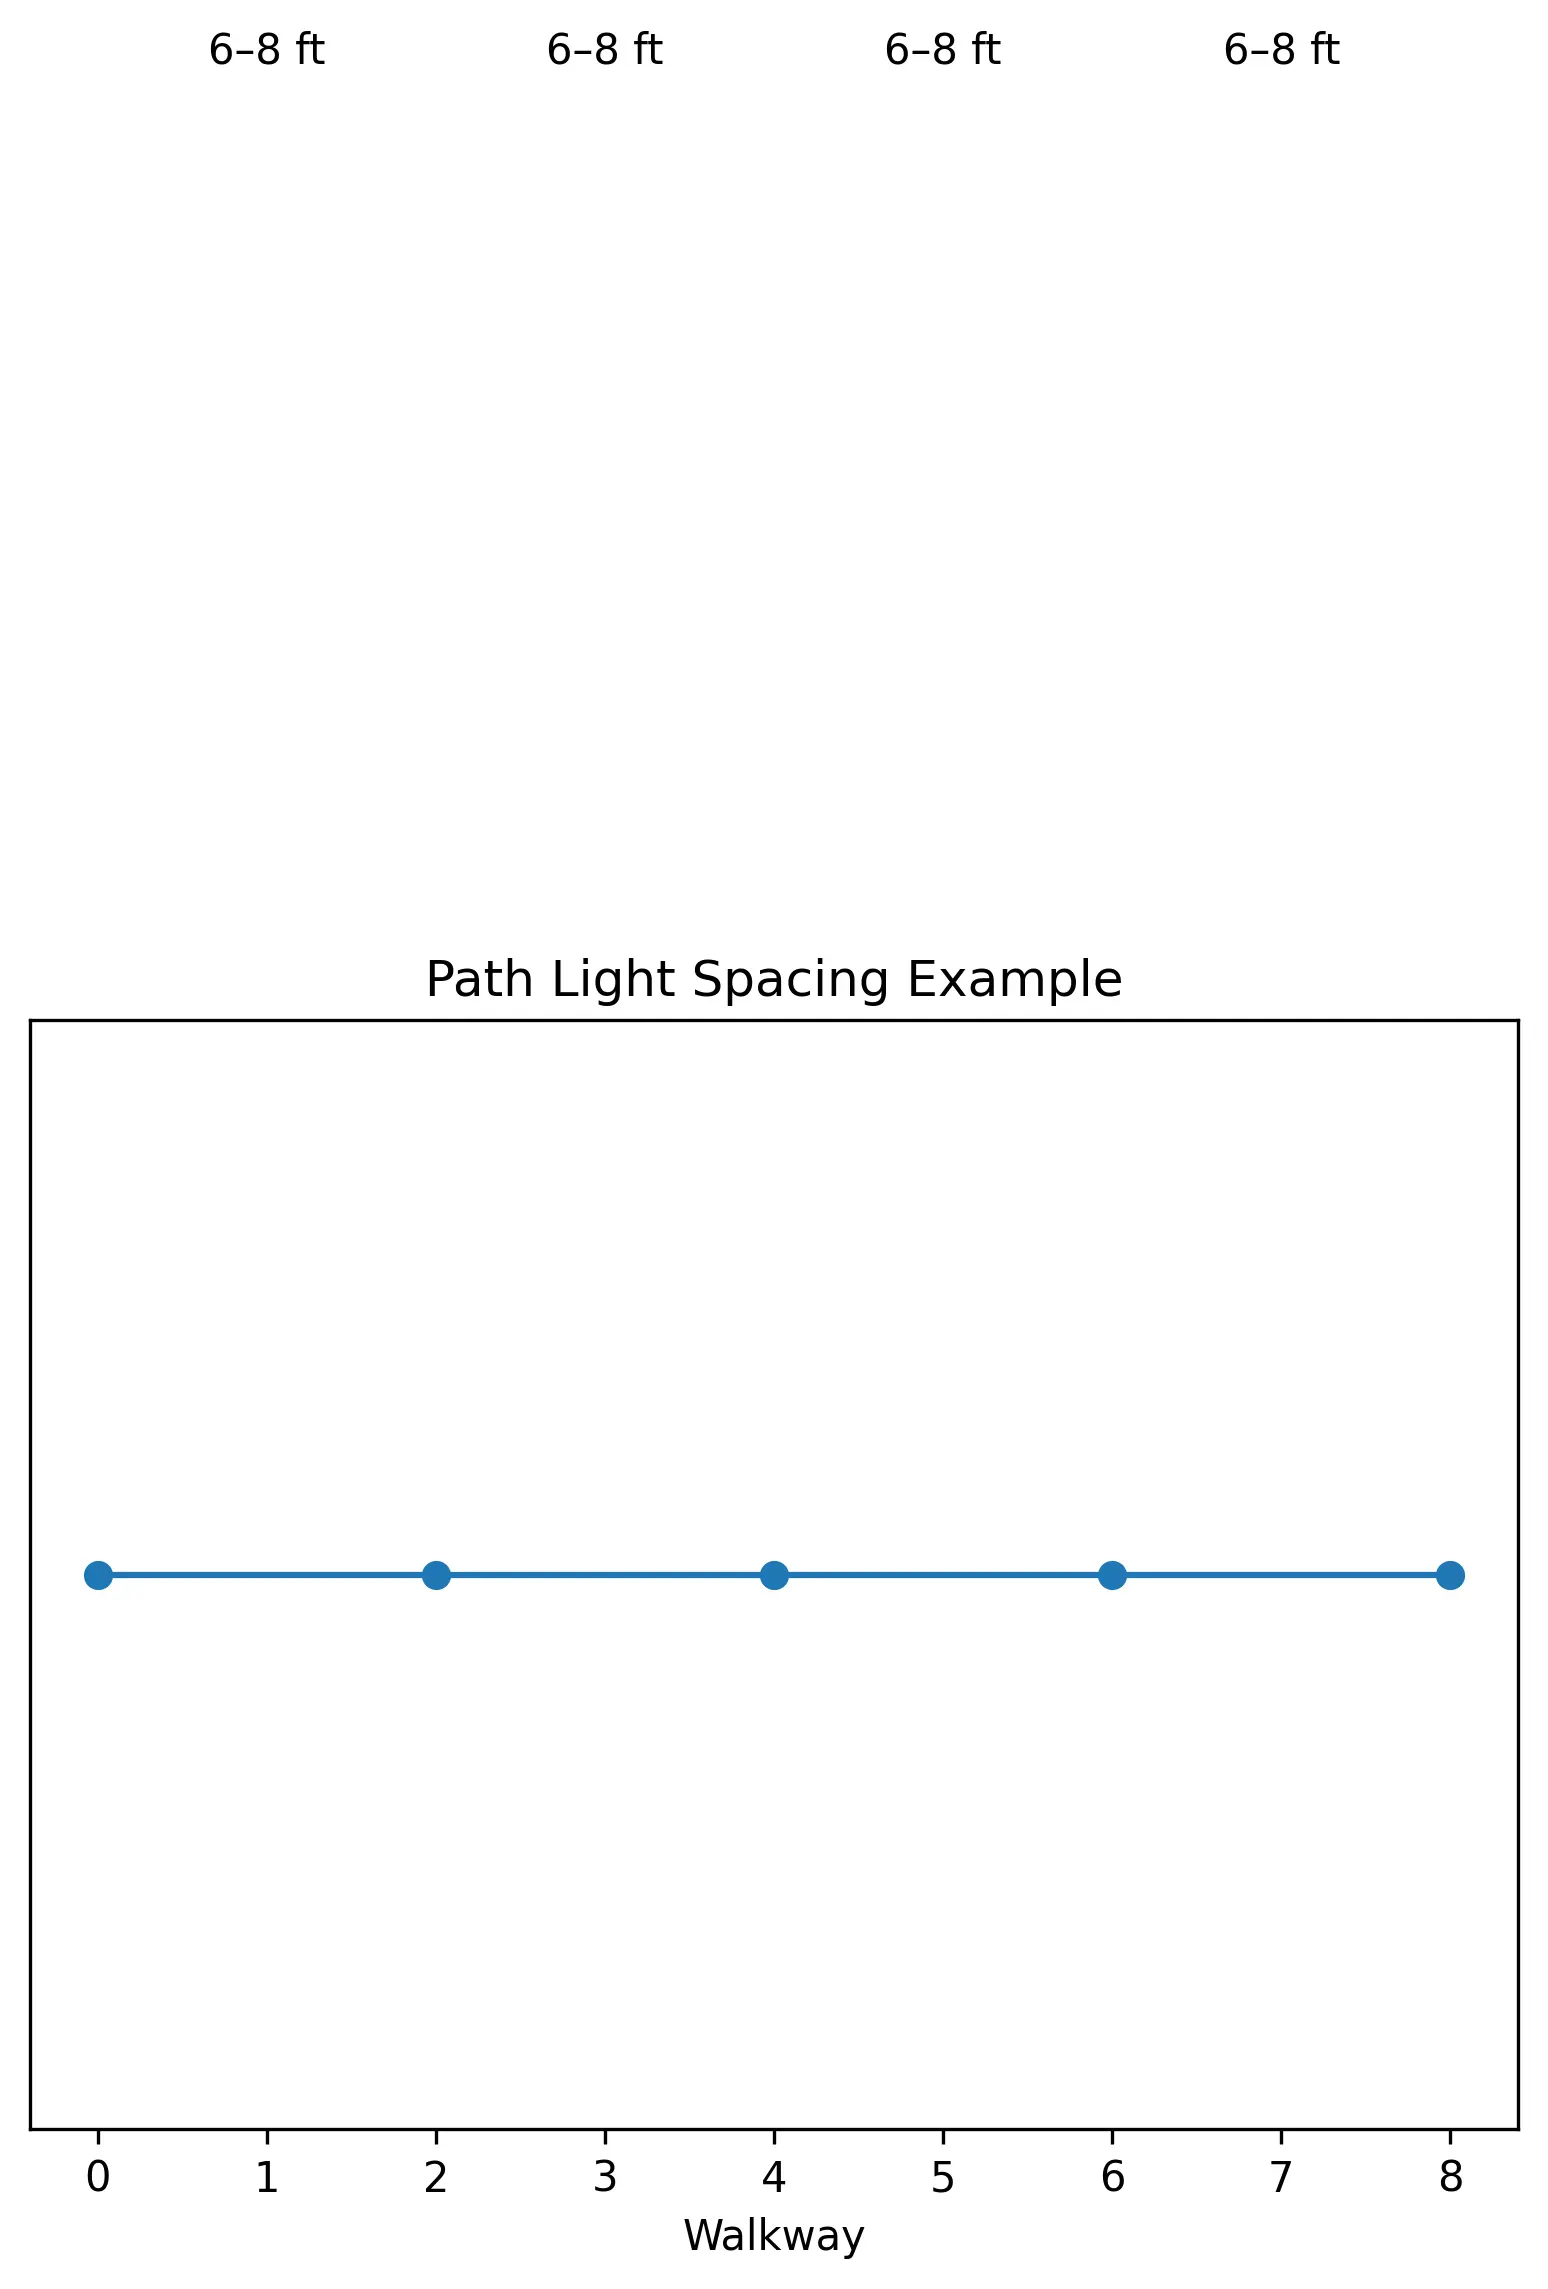
Diagram: Recommended path light spacing for landscape lighting along a walkway. Most installations place fixtures about 6–8 feet apart to create balanced illumination without producing a runway lighting effect.
This diagram shows a simple path lighting layout with fixtures spaced at a practical interval along a walkway. In many residential installations, a spacing range of about 6 to 8 feet works well, but the best distance depends on fixture brightness, beam spread, path width, and how much ambient light is already in the area. The goal is not to create a runway effect. The goal is to create gentle, even guidance along the path.
Best path light spacing for most homes
For many walkways, spacing lights around 6 to 8 feet apart gives a balanced result. On narrower paths, you may use fewer fixtures and stagger them from side to side. On wider or darker paths, you may need slightly closer spacing. It is also smart to test fixture placement at night before making the final installation permanent.
Common path lighting spacing mistakes
The biggest mistakes are placing every fixture directly across from the one on the opposite side, putting fixtures too close together, and ignoring the beam pattern of the light. Even good fixtures can look awkward if the spacing is too tight. A better approach is to think in terms of overlap, softness, and visual rhythm instead of simply counting fixtures.
Spacing becomes even more important around steps because shadows and dark gaps can create a safety issue. If you are lighting stairs, see this outdoor stair lighting guide for more specific recommendations on step light placement, brightness balance, and safe stair illumination.
For more planning help, visit our path light placement guide, landscape lighting layout guide, and landscape lighting design guide.
Check the Portfolio power system before replacing a fixture
On Landscape Lighting Spacing: How Far Apart Lights Should Be, diagnose the installation by failure scope before replacing hardware. One dark fixture points first to that fixture, its lamp/module, local splice, stake, or short lead; several fixtures on one run shift attention upstream to the branch connection and cable; a whole-yard outage shifts the investigation to the transformer, controls, and source power. Preserve fixture model numbers and connector locations as you work so a repair does not erase the evidence needed for later parts matching. Continue with Portfolio Parts when the failure has been narrowed.
Accent Light Spacing
Accent lights follow a different rule than path lights. Instead of using one simple distance range, accent lighting spacing depends on what the fixture is illuminating. The size of the feature, the beam spread, and the intended nighttime effect matter more than a fixed measurement.
Feature Size Changes the Spacing
A small ornamental shrub does not need the same spacing approach as a broad tree canopy or a long wall. The larger the feature, the more carefully the beam has to be matched to the target area.
Beam Spread Matters
Narrower beams usually need more deliberate placement, while wider beams may cover more surface with a single fixture. That is why spacing is closely tied to optics and beam control rather than just distance alone.
Accent spacing should be chosen based on what you want highlighted, not just on how much area you want to fill with light.
Driveway and Walkway Lighting Spacing
Driveways and wider walkways usually need a little more breathing room than smaller garden paths. In many cases, driveway lights are spaced around 8 to 12 feet apart, depending on fixture brightness, edge definition, and how curved the driveway is.
Highlight Curves and Transitions
Straight runs are usually easier to space evenly. Curves, turns, and wider approach zones may need more attention because the eye notices gaps there faster.
Do Not Light Both Sides Too Aggressively
It is easy to overdo driveway lighting by treating every edge the same. The goal is usually guidance and visual structure, not creating a bright landing strip.
Specific Landscape Lighting Distance Rules
These smaller measurements help fine-tune a layout after you know the general spacing range.
| Measurement | Good Starting Distance | Why It Matters |
|---|---|---|
| Path light from sidewalk edge | 6–18 inches | Keeps fixtures close enough to guide the path without becoming a trip hazard. |
| Uplight from tree trunk | 1–6 feet | Small trees need closer placement; larger trees need more distance to reach the canopy. |
| Lights from driveway edge | 12–24 inches | Prevents vehicle contact while still defining the driveway edge. |
| Wall light from retaining wall | 6–12 inches out from base | Helps spread light upward without creating harsh hot spots. |
| Accent light from house wall | 12–36 inches | Gives the beam room to wash the surface instead of blasting one small area. |
| Lights from flower beds | 12–24 inches from plant edge | Reduces plant shadowing and keeps fixtures accessible for adjustment. |
Tree and Architectural Lighting Spacing
Tree spacing and architectural spacing are usually judged by effect rather than by a universal distance rule. These are some of the most design-sensitive parts of an outdoor lighting spacing guide.
Tree Lighting Spacing
Tree lighting depends on canopy width, trunk shape, viewing angle, and beam spread. Some trees look best with one carefully placed uplight, while broader canopies may need more than one fixture for balance.
Wall and Architectural Spacing
When spacing fixtures against walls or structures, the beam spread and surface width become critical. Poor spacing can create bright hot spots instead of a smooth, clean effect. That is why wall lighting is often planned more by beam pattern than by generic distance.
Landscape Lighting Layout and Spacing Work Together
Spacing works best when it is tied to the full layout of the yard. If the overall fixture plan is weak, even correct spacing on one path or bed will not fix the bigger problem.
Before installing fixtures, it helps to create a simple lighting layout plan so spacing stays consistent across the entire yard. A broader landscape lighting layout plan helps decide where fixtures belong, while the landscape lighting design guide helps explain why certain areas deserve more emphasis than others.
Spacing Supports Balance
A yard usually looks best when the fixture placement feels connected rather than random. Good spacing helps one area lead naturally into the next without abrupt changes in brightness.
Many outdoor entertaining spaces combine walkways, patios and fire pit seating areas into one lighting zone, which means fixture placement must account for both pedestrian visibility and nearby heat-producing features. This fire pit lighting placement and gas clearance guide explains important spacing considerations when designing safer outdoor gathering spaces.
How Brightness Affects Spacing
Brightness is one of the biggest reasons a fixed spacing rule does not work for every fixture. Two lights placed the same distance apart can produce very different results if one is brighter, mounted higher, or uses a wider beam.
Lumen Output
Brighter fixtures usually allow wider spacing. Lower-output fixtures often need to be closer together to maintain consistent coverage.
Beam Spread
A wider beam can cover more surface area, while a narrow beam needs more precise placement. This is one reason beam spread affects spacing so much.
Fixture Height
Higher fixtures often spread light farther, while lower fixtures create more localized pools of light. This changes how far apart they can be placed without leaving obvious gaps.
Common Landscape Lighting Spacing Mistakes
A spacing guide would not be complete without showing what goes wrong when fixtures are placed without a clear rule. These are some of the most common spacing mistakes in residential yards.
Lights Too Close Together
This creates glare, visual clutter, wasted fixture count, and a much harsher nighttime look than most homeowners want.
Lights in Rigid Straight Lines
Perfectly mirrored rows can make a landscape feel mechanical instead of natural. Alternating placement often softens the result.
Uneven Brightness
Large dark gaps followed by bright clusters usually mean the spacing was not consistent with fixture output and beam control.
Over-Lighting Small Spaces
Small beds, short paths, and compact entries are easy to overwhelm. Not every space needs the same density of light.
Landscape Lighting Spacing Mistakes Gallery
These common spacing mistakes are easy to spot once you know what to look for. Most bad layouts fail because the lights are spaced by habit instead of by beam overlap, glare control, and the shape of the area.
❌ Runway Lighting
Fixtures are placed too close together or directly across from each other, making the path look like an airport runway.
❌ Dark Hole Effect
Fixtures are spaced too far apart, leaving black gaps between pools of light.
❌ Crossing Beams
Spotlights are aimed across each other instead of at the feature, creating visual confusion and glare.
❌ Hot Spots
Fixtures are too close to walls, trees, or columns, creating harsh bright patches instead of smooth illumination.
❌ Tree Uplight Too Close
The light hits only the trunk and misses the canopy, making the tree look narrow and unnatural.
❌ Tree Uplight Too Far
The beam loses intensity before reaching the canopy, making the tree look flat or underlit.
Spacing and Electrical Planning
Landscape lighting spacing is not just a design choice. Every added fixture changes cable length, voltage drop, transformer load, connector stress, and how evenly the system performs at night.
Why Spacing Changes Voltage Drop
The farther fixtures are spread across a yard, the longer the cable run usually becomes. Longer wire runs create more resistance, which can reduce voltage at the farthest lights. A layout that looks evenly spaced on paper can still look uneven at night if the last fixtures receive less power than the first fixtures.
When 16/2 Cable Becomes a Problem
16/2 cable can work for short, low-wattage runs, but it becomes less forgiving as distance and fixture count increase. If the run is long, the fixture count is high, or the end lights look dimmer than the first lights, 14/2 or 12/2 cable is usually a better choice.
How Transformer Tap Selection Affects Spacing
Some low-voltage transformers include multiple voltage taps. A longer run may need a higher tap to keep the farthest fixtures within a useful voltage range. The goal is not to overpower the first lights. The goal is to keep the entire run balanced.
Why LED Wattage Is Not the Whole Story
LED fixtures use fewer watts than older halogen fixtures, but low wattage does not automatically mean perfect spacing. Beam angle, lumen output, fixture height, and surface color all change how far the light appears to spread.
Beam Angle vs Spacing
A narrow beam usually needs tighter placement because the light is concentrated. A wide beam can often be spaced farther apart because the light spreads over a larger area. This is why two fixtures with the same wattage can need very different spacing.
Fixture Height vs Spacing
Taller path lights usually spread light farther across the ground, while short fixtures create smaller pools of light. If you replace one fixture style with another, the old spacing may no longer look right.
For deeper planning, pair this spacing guide with the landscape lighting voltage drop guide, landscape lighting wire gauge guide, and transformer size calculator.
Preserve usable Portfolio components during an upgrade
On Landscape Lighting Spacing: How Far Apart Lights Should Be, diagnose the installation by failure scope before replacing hardware. One dark fixture points first to that fixture, its lamp/module, local splice, stake, or short lead; several fixtures on one run shift attention upstream to the branch connection and cable; a whole-yard outage shifts the investigation to the transformer, controls, and source power. Preserve fixture model numbers and connector locations as you work so a repair does not erase the evidence needed for later parts matching. Continue with Portfolio Parts when the failure has been narrowed.
Portfolio Landscape Lighting Spacing
Many homeowners install low-voltage landscape lighting systems using Portfolio landscape lighting fixtures. Portfolio path lights, spotlights, and accent fixtures follow the same spacing principles described in this guide. If you are planning or troubleshooting a Portfolio outdoor lighting system, these resources may help:
Landscape Lighting Spacing FAQ
How far apart should landscape lights be?
Most path lights are spaced between 6 and 10 feet apart, depending on brightness, beam spread, and the look you want. Accent light spacing depends more on the size of the feature being illuminated.
Should landscape lights be evenly spaced?
Yes, but evenly spaced does not always mean perfectly mirrored. Alternating placement often creates a more natural appearance.
How far apart should driveway lights be?
Driveway lights are often spaced around 8 to 12 feet apart, depending on fixture brightness, driveway width, and the shape of the approach.
Can landscape lights be spaced too close together?
Yes. Lights placed too close together often create glare, hot spots, wasted fixture count, and a cluttered nighttime appearance.
What affects landscape lighting spacing the most?
The biggest factors are fixture brightness, beam spread, mounting height, area width, and whether the goal is wayfinding, accent lighting, or broad coverage.
Final Thoughts on Landscape Lighting Spacing
Good low voltage landscape lighting spacing is one of the simplest ways to make an outdoor system look more professional. It helps paths feel guided, focal features look intentional, and the whole yard feel balanced instead of overlit.
The best spacing decisions come from combining practical distance rules with fixture brightness, beam spread, and the actual layout of the yard. That is why a small spacing adjustment can sometimes improve the nighttime look more than buying more fixtures.
Start with the standard ranges, test the effect visually, and then fine-tune based on the way the space actually feels after dark.
Good landscape lighting spacing starts with fixture placement, but it also depends on wiring, voltage, and how the system is organized behind the scenes. A walkway can still look uneven even when the fixtures seem evenly spaced if the farthest lights are losing power along the cable run. That is why it helps to pair spacing plans with our landscape lighting voltage drop guide. If you are still laying out the cable path, our how to wire landscape lighting guide explains how the wiring route affects the finished result. For a brand-specific example, our Portfolio lighting wiring diagram shows a practical layout approach. If you are planning a larger system, our low voltage landscape lighting zones guide will help you organize fixtures into sections so the spacing and brightness stay more consistent across the property.
Related Landscape Lighting Measurements
Spacing is only one measurement in a strong outdoor lighting plan. These related measurements help control brightness, safety, voltage, and long-term reliability.
Path Light Height
Taller fixtures spread light farther. Shorter fixtures create tighter pools of light and may need closer spacing.
Transformer Distance
The farther the transformer is from the last fixture, the more carefully voltage drop must be planned.
Wire Burial Depth
Burial depth affects safety, inspection risk, and whether cables are protected from landscaping damage.
Fixture Setback
Setback from paths, driveways, plants, and walls changes both appearance and damage risk.
Tree Uplight Distance
Tree lighting depends on trunk width, canopy size, beam spread, and viewing angle.
Beam Spread and Lumens
Beam angle and lumen output determine whether a spacing plan looks soft, dim, harsh, or balanced.
Landscape Lighting Spacing, Path Light Distance, and Outdoor Fixture Placement Planning
This page is designed to answer one practical homeowner question clearly: how far apart landscape lights should be. Use it as a spacing reference for path lights, driveway lighting, accent fixtures, and low-voltage planning across the yard.
If you are still in the early stages, the best next step is usually pairing spacing decisions with the broader layout and design pages so the fixture count, placement, and electrical plan all work together.