
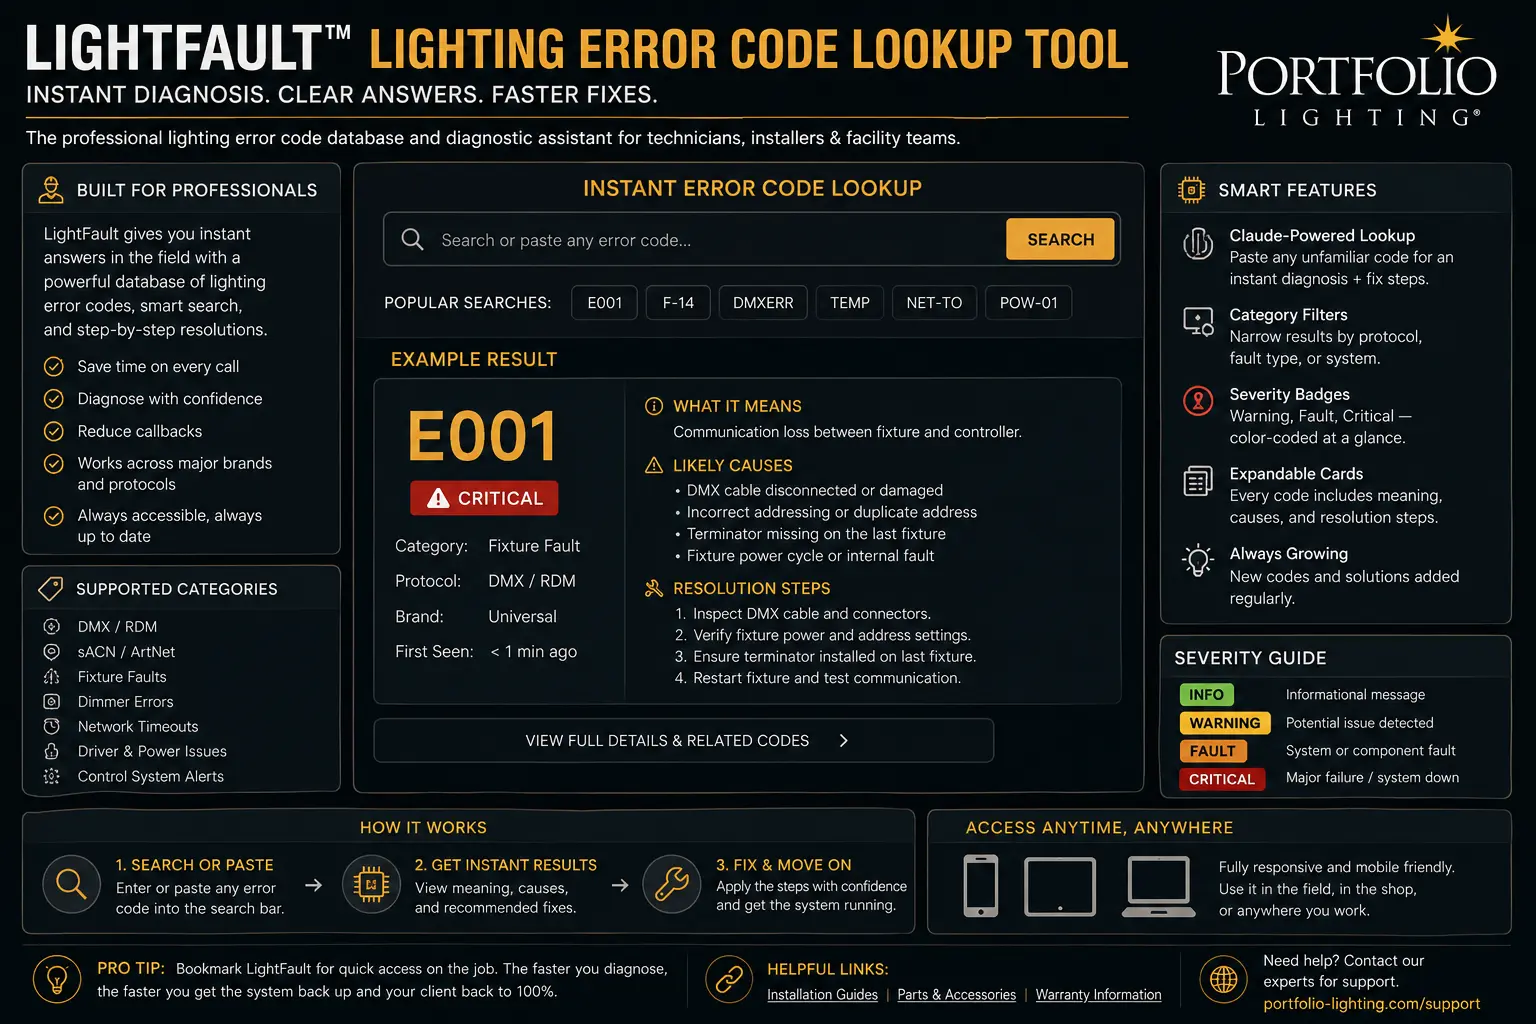
🔍 Fault Lookup Tool
Type what you see on your transformer or what it's doing. Try: E1, OL, blinking, clicking, beeping, photocell, overload, short, reset, no output, flashing red, Hampton Bay, Portfolio, Malibu.
What this code means
The transformer's dusk-to-dawn photocell has a fault — either the sensor has failed, its wiring connector is unseated, or there is a wiring fault in the photocell circuit. This code appears on the HB-200's display (Item #1005926363, model HB-200-1215WIFI). The transformer may still deliver output power on zones, but automatic dusk/dawn scheduling will not function correctly with a failed photocell.
Most likely causes
- Photocell lead connector not fully seated in its port
- Photocell lens covered by debris, mulch, or spider webs (sensor reads constant dark, thinks it's always night)
- Photocell component has failed after weather exposure — common after 3–5 years outdoors
- Water intrusion into the photocell connector jack
First steps
- Disconnect transformer from GFCI outlet
- Locate the photocell connector — typically a small plug-in socket on the transformer face or side
- Unplug and firmly re-seat the photocell connector
- Clean the photocell lens with a dry cloth — remove any covering debris
- Reconnect and test. If E1 clears, the connector was the issue. If E1 persists, replace the photocell
Use the Hampton Bay 200W transformer error codes and manual guide for model-specific photocell replacement steps.
What this indicator means
The zone button's LED flashes instead of staying on. Per the official HB-200 Hubspace manual: "LED flash: The loading is over limitation power or short circuit." After troubleshooting, press the zone button again to resume normal operation. This indicator applies to zones CH1, CH2, and CH3 on the HB-200's 3-zone layout.
Most likely causes
- Total fixture wattage on the flashing zone exceeds the zone's rated limit
- A shorted wire splice on that zone — corroded pierce-point connector, water-saturated direct-burial splice
- A failed LED driver in one fixture creating near-short conditions
- A fixture stake driven into the landscape wire, creating a conductor-to-conductor short
First steps
- Disconnect all fixtures from the flashing zone's terminal connections
- Press the zone button — if the LED stops flashing with no load, the issue is in the zone's wiring or fixtures
- Reconnect fixtures one at a time, pressing reset after each addition, until the flash returns
- The last fixture/connection added when the flash returns is the fault point
- Inspect that connection for shorts, corrosion, or a fixture with shorted driver
What this means
Per the HB-200 manual: "System Overload: if your transformer detects a system overload it will shut off. The indicator light will flash." The entire transformer output shuts down, not just one zone. The HB-200's internal power meter (which shows capacity usage in the Hubspace app) was exceeding 200W total across all three zones simultaneously.
Most likely causes
- Total wattage of all fixtures on all three zones exceeds 200W
- LED fixtures with power factor below 0.7 drawing higher VA than watts — see the load calculation guide
- A single fixture failure that dramatically spikes current draw on system startup
First steps
- Check total system wattage using the Hubspace app's power meter reading — must stay below 160W (80% of 200W rated)
- If wattage appears within limits, calculate actual VA using VA = Watts ÷ power factor (use 0.7 if unknown)
- Reduce fixture count or distribute across zones to balance load
- After reducing load, press the transformer button to resume
What this means
Older Hampton Bay analog landscape transformers (DIY-300PS, SL-200-12, and similar) do not have display screens or alphanumeric codes. Fault conditions are indicated by no power output with the timer in the ON position. The transformer has shut down via its internal thermal protection or resettable circuit breaker.
Most likely causes
- Internal resettable circuit breaker has tripped — look for a small red or black button on the transformer face that has popped out
- Internal thermal protection tripped from overloading — the transformer ran too hot and shut down
- Timer or photocell programmed incorrectly — not an actual fault, just incorrect settings
- No power at the GFCI outlet — check that the outlet has power and is not tripped
First steps
- Check the GFCI outlet — press the GFCI test and reset buttons, verify the outlet has power
- Find the reset button on the transformer (typically a small round button on the front or side) — press it firmly
- If transformer immediately trips again, a short circuit or severe overload is present — disconnect all zones and reconnect one at a time
- Check timer/photocell settings — ensure the mode is set to ON or a timer window that includes the current time
See the full Hampton Bay transformer guide for model-specific reset and replacement procedures.
What this code means
An "E" code displayed on a Portfolio landscape lighting transformer (60W, 120W, 150W, 200W, or 300W digital models) indicates an output-side fault. Per documented field diagnosis from Portfolio model service calls: "An E code on a Portfolio path light transformer usually signals an overload or short circuit." The transformer has detected an unsafe condition on the 12V secondary output and has shut down that zone to protect itself. The E appears on the zone display or control panel.
Most likely causes
- Total wattage of connected fixtures exceeds the zone's or transformer's rated output — especially after LED conversions where VA exceeds labeled watts
- A shorted wire connection — corroded splice, pierce-point connector pushed through both conductors, wire nick creating conductor-to-conductor contact
- Wire gauge too small for run length creating high resistance that appears as overload (see the voltage drop code guide)
- A loose terminal connection at the transformer creating intermittent high resistance
First steps
- Unplug the transformer from the GFCI outlet — wait 5 minutes
- With the transformer unplugged, disconnect all fixture zone wires from the terminal block
- Plug the transformer back in — if E code clears with no load connected, the fault is in the secondary wiring or fixtures
- Reconnect zones one at a time. When E returns, the last zone added contains the fault
- Inspect the fault zone: check every splice connector for corrosion (dark or green copper), look for wire insulation damage, test each fixture individually
- If E code returns with no load connected at all, the transformer itself has an internal fault — replace it
See the Portfolio transformer troubleshooting guide and Portfolio transformer reset guide for detailed step-by-step procedures.
What this indicator means
The small round reset button on the Portfolio transformer face (sometimes labeled "RESET" or visually obvious as a small raised button) has popped out or is in the tripped position. The internal circuit breaker — which serves as the secondary-side overcurrent protection device per NEC Article 411 — has detected an overload or short circuit and disconnected the output.
Critical distinction
Do not simply press reset and walk away. The reset button will trip again immediately if the root cause is still present. Pressing reset without diagnosis means repeated cycling of the protection device, which stresses the transformer. Diagnose first, reset second. Per the Portfolio transformer master guide: "If the reset button is popped or tripped, that usually points to a short circuit, overload, or wiring fault. It does not automatically mean the transformer itself is dead."
First steps
- Disconnect all secondary zone wires before pressing reset
- Press the reset button — it should click in and stay
- Reconnect one zone at a time — if reset trips immediately upon adding a zone, that zone has a short circuit
- If reset holds with one zone but trips when adding more, the system is overloaded
- See the load calculation guide to verify you're within the 80% wattage limit
What this symptom means
The transformer makes a rapid clicking sound and lights cycle on and off every second or few seconds. Per documented field diagnosis: "The clicking sound usually indicates the transformer's internal relay is rapidly switching due to a short circuit or overload." The transformer detects a fault, shuts down, the thermal protection briefly resets, the transformer attempts to turn on, detects the fault again, and repeats. This cycling stresses the relay. Do not leave a clicking transformer plugged in for extended periods.
Most likely causes
- A short circuit in the secondary wiring — most commonly at a corroded pierce-point connector or at a damaged wire section where both conductors contact each other
- A severely overloaded system where the protection threshold and the actual load are very close together — the transformer cycles between tripped and attempting to operate
- A minimum load issue on certain transformer designs — the transformer needs a minimum load to operate stably (rare but documented with LED conversions from halogen systems)
First steps
- Unplug the transformer immediately
- Disconnect ALL secondary wires from the terminal block
- Plug the transformer back in with zero load — if it still clicks with no load connected, the transformer itself has a fault and should be replaced
- If it holds steady with no load, reconnect one zone wire at a time — clicking returns when the short-circuit zone is connected
- Inspect the fault zone thoroughly for shorted splices, damaged insulation, or a fixture with a shorted driver
What this means
Malibu landscape transformers (models 8100-0200-01, 9120-0120-01, 300W Classic, and others) use a built-in circuit breaker rather than an electronic display for fault indication. The breaker trips silently — there is no audible alarm. The only indicator is that the lights stop working and the breaker button has popped out. Per the Malibu 200W manual: "A built-in circuit breaker is included and may need to be reset if the power pack overloads."
Most likely causes
- Total wattage of connected fixtures exceeds the transformer's capacity (200W, 300W, or 600W depending on model)
- Short circuit in the secondary wiring
- Per the Malibu 300W manual: "If the circuit breaker frequently trips, it may indicate an overload. Reduce the total wattage of connected lights or consider adding another transformer."
First steps
- Locate the circuit breaker button on the Malibu transformer face — it should be visibly protruding
- Disconnect all secondary wires first
- Press the circuit breaker button firmly until it clicks and stays in
- Reconnect zones one at a time — if breaker trips immediately on reconnecting a zone, that zone has a short
- Calculate total fixture wattage — ensure the total (accounting for LED VA, not just watts) stays under 80% of the transformer's rated wattage
See the Malibu 8100/9120 transformer manual and troubleshooting guide for model-specific procedures.
What this code means
"OL" on a digital landscape lighting transformer display means "Overload" — the secondary circuit is drawing more current than the transformer can safely supply. Some digital transformers from generic brands (BN-LINK, SUNVIE, GARDENREET) and the Malibu digital series use "OL" on their LCD displays. The transformer has either shut down output or is at risk of doing so. This is distinct from a short-circuit fault (which typically shows Er or trips instantly) — OL indicates the load is excessive but not necessarily shorted.
Most likely causes
- Too many fixtures connected — total wattage or VA exceeds transformer rating
- LED fixtures with low power factor (0.5–0.7) drawing higher VA than their labeled watts — a 7W LED may draw 10 VA; use VA = Watts ÷ Power Factor for accurate load calculation
- Fixtures added after initial installation that pushed the system past the limit
First steps
- Count up all connected fixture wattages and divide by 0.7 to estimate VA if power factor is unknown
- Confirm total VA is under 80% of the transformer's rated wattage
- Remove fixtures from the highest-loaded zone until OL clears
- Consider upgrading to a higher-capacity transformer — see the transformer sizing guide and transformer size calculator
What this means — universal behavior
A blinking or flashing LED on any landscape lighting transformer's zone button or status indicator universally means the same thing: that zone has detected either an overload (too much total wattage) or a short circuit (two conductors making unintended contact). This behavior is consistent across Hampton Bay, Portfolio, Malibu, and all generic brands — the flashing LED is the standard visual signal for secondary circuit protection activation.
Distinguishing overload from short circuit by blink pattern
- Overload: LED starts solid, then flashes after a delay (minutes of operation) — the transformer warmed up and thermal protection triggered. The system was drawing too much power over time.
- Short circuit: LED flashes immediately when the zone is energized, or within seconds of connecting load. The fault is instantaneous — a conductor-to-conductor short is present.
First steps
- Disconnect all load from the flashing zone
- Press the zone button or transformer reset
- Reconnect fixtures one at a time
- If LED flashes immediately when adding any fixture, walk that zone's wire looking for a damaged connector or pinched cable
- If LED holds then flashes after a delay, calculate total zone wattage — you're over the limit
See the low-voltage failure points guide for the complete short-circuit and overload diagnostic procedure.
What this symptom means
Lights stay on all day (photocell reads constant dark) or won't turn on at dusk (photocell reads constant light). On Portfolio, Malibu, and older Hampton Bay analog transformers, this appears as incorrect automatic behavior without any code — the transformer has no code to show for a photocell issue on analog models. On the Hampton Bay HB-200 Hubspace, a photocell circuit failure shows as E1.
Most likely causes
- Lights on all day: Photocell covered by debris, spider web, or shadowed by new vegetation — reads constant darkness and stays in "on" mode
- Lights on all day (second cause): A light source (porch light, streetlight) shining directly on the photocell at night — it reads "daylight" and never triggers
- Won't turn on at dusk: Photocell lens clouded by UV degradation after years of sun exposure — no longer sensitive enough to detect darkness
- Won't turn on at dusk (second cause): Photocell lead disconnected from transformer connector
First steps
- Cover the photocell lens with your hand — if the lights immediately come on, the sensor is functional but being lit by an external source at night
- Clean the photocell lens with a soft cloth — remove all debris and spider webs
- Rotate the photocell to face away from any nearby light sources
- If covering the lens produces no response, the photocell has failed — replace it
See the landscape lighting photocell not working guide for full diagnosis steps.
What this means
The transformer shows no codes, no blinking, no clicking — it simply produces no output. Lights do not turn on in any mode. This "silent failure" is the most diagnostically ambiguous state because it could be: (a) no power at the GFCI outlet, (b) a tripped internal circuit breaker that isn't visually obvious, (c) a failed timer or photocell keeping the output off, (d) a completely failed transformer, or (e) a programming issue.
Systematic diagnosis order
- GFCI outlet first: Plug a phone charger or lamp into the GFCI outlet — does it have power? Press the GFCI reset button. Many "dead transformers" are actually tripped GFCI outlets
- Timer/photocell settings: Manually override to "ON" mode — does output return? If yes, the programming is wrong, not the transformer
- Reset button: Locate and press any reset button on the transformer face
- Measure output voltage: Use a multimeter on the transformer's 12V terminals with transformer in ON mode — should read 11.5V–15V depending on tap selected. Zero volts means the transformer is not outputting despite the above checks
- Zero volts with power confirmed: Internal failure. Replace the transformer
See the transformer guide, the Portfolio transformer not working guide, and the how to test a landscape lighting transformer guide.
What beeping means
A beeping sound from a landscape transformer is produced by its internal buzzer when the protection circuit activates. Most consumer landscape transformers do not have audio alerts — but some digital models (particularly newer smart transformers and some commercial-grade units) include a buzzer that beeps on overload, on schedule change confirmation, or on fault detection. The specific meaning of single vs multiple beeps varies by model and should be confirmed in the product manual.
General beep patterns
- Single short beep: Usually a confirmation signal — button press acknowledged, schedule set, mode changed. Not a fault.
- Continuous or rapid beeping: Protection circuit actively responding to fault condition — overload or short circuit present. Disconnect load.
- Beeping with blinking indicator: Combined fault signal — treat as overload or short circuit until proven otherwise
- Beeping at scheduled times without turning on: Timer or scheduling error, not a hardware fault
First steps
- Check the transformer's user manual for the specific beep code definitions for your model
- For continuous beeping: disconnect all secondary load and see if beeping stops — if yes, reconnect zones one at a time
- For beeping on schedule events: review timer programming settings
- If no manual is available, treat any continuous beeping as an overload/fault signal and diagnose accordingly
Try a broader term: E1, E code, OL, blinking, flashing, clicking, beeping, reset, short, overload, photocell, Hampton Bay, Portfolio, Malibu, or no output.
All Fault Indicator Types: What Your Transformer Is Telling You
Consumer landscape lighting transformers use five different methods to signal faults. Most use only one or two of these — knowing your transformer's signaling type helps you interpret what you're seeing.
| Indicator Type | What It Looks Like | Brands That Use It | What It Means | Immediate Action |
|---|---|---|---|---|
| Alphanumeric Code on Display | E1, E, OL, Er | Hampton Bay HB-200 Hubspace (E1); Portfolio digital models (E); generic digital models (OL, Er) | Specific fault — meaning varies by code and brand. See lookup tool above. | Look up the specific code in the lookup tool or product manual. Do not reset without diagnosing. |
| Flashing / Blinking Zone LED | Zone button LED blinks instead of solid on | Hampton Bay HB-200 (documented in manual); Portfolio digital models; generic smart transformers | Overload or short circuit on that zone. Universal meaning across all brands. | Disconnect all load from flashing zone, reset, reconnect one fixture at a time to isolate fault. |
| Reset Button Tripped | Small round button protrudes or pops out on transformer face | Portfolio (analog and semi-digital); Malibu; Hampton Bay analog | Internal circuit breaker activated — overload or short circuit. Secondary output disconnected. | Disconnect all zones, find and fix the cause, then press reset. Do NOT reset with load connected. |
| Rapid Clicking | Audible clicking sound, lights cycle on/off rapidly | Portfolio and any relay-switched transformer with a short-circuit condition | Short circuit causing protection to trip and reset repeatedly. Stresses the relay. | Unplug immediately. Disconnect all zones. Find and repair the short before powering on. |
| No Output — No Indicator | Lights don't work, no codes, no flashing, no clicking | All brands — especially older analog units | Ambiguous — could be GFCI trip, timer/settings issue, tripped breaker, or complete transformer failure. | Test GFCI outlet first, check settings, press reset button, then test output voltage. |
| Beeping / Audio Alert | Audible beep tones from internal buzzer | Some digital and smart transformers; rare on consumer analog models | Varies: single beep = confirmation; continuous beeping = fault. Check product manual for beep code definitions. | For continuous beeping: treat as fault and disconnect load. For single beeps: likely normal operation confirmation. |
Quick Reference: All Documented Fault Signals
Every fault entry from the lookup tool, visible without clicking. Use this to scan quickly or share a direct link to a specific fault. Click any fault heading to jump to its full diagnosis in the tool above.
Hampton Bay Transformers
Photocell sensor fault. The dusk-to-dawn sensor has a wiring fault, disconnected lead, or failed component. Reseat the photocell connector and clean the lens. If E1 persists, replace the photocell. Brand-specific — E1 only means photocell fault on the HB-200 Hubspace model. See the Hampton Bay 200W error codes and manual guide.
Zone overload or short circuit. Per the official HB-200 manual: "LED flash: The loading is over limitation power or short circuit." Disconnect all fixtures from the flashing zone, press the zone button to reset, reconnect one fixture at a time. Universal signal — this meaning applies across all brands with LED zone indicators.
Total system exceeds 200W — all outputs shut off. Per the HB-200 manual: "If your transformer detects a system overload it will shut off. The indicator light will flash." Check total VA across all three zones using the Hubspace app power meter. Must stay below 160W (80% of 200W). See the load calculation guide.
Transformer has shut down — no alphanumeric code shown. Analog Hampton Bay transformers have no display. Fault conditions appear as dead output only. Check the GFCI outlet first, then locate and press the reset button on the transformer face, then reconnect zones one at a time. See the Hampton Bay transformer guide.
Portfolio Transformers
Output fault — overload or short circuit on the secondary circuit. Documented from JustAnswer expert field sessions: "An E code on a Portfolio transformer usually signals an overload or short circuit." Unplug for 5 minutes, disconnect all zones, reconnect one at a time. E returning immediately = short circuit. E returning after minutes = overload. Brand-specific display convention — Portfolio uses single "E," not E1/E2. See the Portfolio transformer troubleshooting guide and reset guide.
Internal circuit breaker activated — overload or short circuit. The small round button on the transformer face has popped out. Do not press reset with load connected — find the fault first. Disconnect all zones, press reset, reconnect one zone at a time until the fault zone is identified. Universal signal — same behavior and meaning on Malibu and Hampton Bay analog models.
Rapid on/off relay cycling caused by a short circuit. The transformer detects a short, shuts off, briefly resets, detects it again, repeats. Unplug immediately — prolonged clicking stresses the relay. Disconnect all zones and reconnect one at a time. The zone that triggers clicking immediately upon connection contains the short. Check splice connectors, damaged insulation, and fixture drivers. Universal symptom — any relay-switched transformer produces this when a short is present. See the splice connection code requirements and failure points guide.
Malibu Transformers
Built-in circuit breaker activated by overload or short circuit. Per the Malibu 200W manual: "A built-in circuit breaker is included and may need to be reset if the power pack overloads." Per the 300W manual: "If the circuit breaker frequently trips, it may indicate an overload." No alphanumeric display — fault is visible only as the breaker button protruding. Disconnect all zones, press reset, reconnect one at a time. Universal behavior — same mechanism as Portfolio and Hampton Bay reset buttons. See the Malibu 8100/9120 troubleshooting guide.
Generic & All-Brand Fault Signals
Output Limit exceeded — total load is over the transformer's rated capacity. Not a short circuit — OL means too many watts (or VA). Calculate total VA using: VA = fixture watts ÷ power factor (use 0.7 for LED if unknown). Total must stay under 80% of the transformer's rated wattage. Remove fixtures until OL clears. Near-universal convention — OL means overload on virtually all digital landscape transformer displays. See the transformer size calculator and load calculation guide.
Zone overload or short circuit — the most universal fault signal in landscape lighting. A flashing zone LED means exactly the same thing across every brand: that zone's secondary protection has activated. Timing distinguishes the cause: flashes immediately = short circuit in the wiring or a fixture; flashes after several minutes = thermal overload. Disconnect the fault zone, reset, reconnect fixtures one at a time. See the one zone not working guide and the all lights out guide.
Lights stay on all day, or won't turn on at dusk. On the Hampton Bay HB-200 Hubspace this shows as E1. On all other brands it appears as incorrect automatic behavior with no code. Cover the photocell with your hand — if lights come on immediately, the sensor works but a nearby light source is triggering it at night. If no response, the photocell has failed. Universal behavior — same diagnosis regardless of brand. See the photocell not working guide.
Transformer produces no output and shows no fault indicator. Four possible causes in diagnosis order: (1) GFCI outlet tripped — test it first; (2) reset button tripped but not visually obvious — press it; (3) timer or photocell keeping the output off — override to manual ON; (4) internal transformer failure — measure output voltage at terminals, should read 11.5–15V. Zero volts with confirmed input power = replace the transformer. See the how to test a landscape lighting transformer guide and the transformer not working guide.
Beep meaning is brand-specific — do not assume without your model's manual. Single short beep = usually confirmation (button acknowledged, schedule set). Continuous or rapid beeping = usually fault condition (overload or short). Beeping at schedule times without turning on = programming error, not hardware fault. Brand-specific — beep patterns are not standardized across manufacturers. Always consult your specific model's manual for beep code definitions.
Brand-by-Brand Error Code & Fault Indicator Reference
Use this table to identify what fault signaling system your specific transformer brand uses, which codes or indicators it produces, and whether those signals are manufacturer-specific or universal in meaning.
| Brand & Model Family | Display Type | Documented Fault Signals | What Each Signal Means | Universal or Brand-Specific? |
|---|---|---|---|---|
| Hampton Bay HB-200 Hubspace Model HB-200-1215WIFI · Smart/App |
LED indicator per zone button + Hubspace app power meter | E1 LED FLASH SYSTEM OVERLOAD |
E1: Photocell sensor fault or wiring issue LED Flash: Zone overload or short circuit on that zone System Overload: All-zones total exceeds 200W; all outputs shut off, indicator flashes |
E1 = Brand-specific LED Flash = Universal System OL = Universal concept |
| Hampton Bay Analog DIY-300PS, SL-200-12, 120W, 150W models — No display screen |
No alphanumeric display. Reset button + power indicator only | RESET TRIPPED NO OUTPUT |
Reset tripped: Overload or short circuit tripped internal breaker No output: Tripped breaker, timer/photocell error, or complete internal failure |
Both = Universal behavior No brand-specific codes — these models have no display |
| Portfolio (all wattages) 60W, 120W, 150W, 200W digital models — Lowe's brand |
Small LCD or LED display on digital models; reset button only on analog models | E RESET TRIPPED CLICKING |
E: Output fault — overload or short circuit on secondary Reset tripped: Breaker activated by overload or short Clicking: Internal relay cycling rapidly due to short circuit |
E code = Portfolio-specific display Reset trip = Universal Clicking = Universal symptom |
| Malibu (8100, 9100, 9120 series) 200W, 300W, 600W — No display screen |
No alphanumeric display. Built-in circuit breaker button only | BREAKER TRIPPED NO OUTPUT |
Breaker tripped: Overload or short circuit. Manual reset required after reducing load No output: Tripped breaker, photocell/timer error, or internal failure |
Both = Universal behavior No brand-specific codes — these models have no display |
| Generic Digital Transformers BN-LINK, SUNVIE, GARDENREET, VEVOR — LCD display models |
LCD display with digit/letter codes | OL Er / Err LED FLASH |
OL: Output Limit exceeded — total load over capacity Er / Err: Error state — short circuit or internal fault detected LED Flash: Zone-level overload or short (on multi-zone units) |
OL = Universal meaning Er/Err = Near-universal convention LED Flash = Universal |
Key finding: Only two families of consumer landscape transformers show alphanumeric error codes on a display: the Hampton Bay HB-200 Hubspace (E1) and generic digital LCD models (OL, Er). Every other brand — including all Portfolio analog models, all Malibu models, and older Hampton Bay analog units — communicates faults through physical indicators only: a tripped reset button, a flashing LED, or relay clicking. If your transformer has no display, there are no letter/number codes to look up.
5-Step Diagnostic Flow: From Fault Signal to Root Cause
Every transformer fault — E code, OL, blinking LED, clicking, tripped reset — follows the same diagnostic sequence. Run through these five steps in order. Most faults are resolved at step 2 or 3.
Plug a phone charger or lamp into the GFCI outlet. Does it work? Press the GFCI reset button — many apparent transformer faults are actually tripped GFCI outlets. If the outlet is dead, the transformer has no input power and cannot produce any fault indicator. Fix the outlet first before diagnosing the transformer.
Unplug the transformer. Disconnect every secondary wire from the terminal block — all zones, no fixtures connected. Plug the transformer back in and put it in manual ON mode. Does the fault indicator (E code, LED flash, clicking) clear? If yes: the fault is in the secondary wiring or fixtures, not the transformer itself. If no: the transformer has an internal fault.
With the transformer running clean (no load), reconnect one zone wire at a time. After each zone reconnection, wait 60 seconds. When the fault indicator returns, the last zone you connected carries the fault — either a short circuit or an overload contribution from that zone's fixtures.
With the fault zone identified, disconnect its fixtures one by one. If the fault clears when a specific fixture is removed — that fixture has a shorted driver. If the fault persists even with all fixtures removed but the zone wire still connected — the short is in the wire itself or a splice connector. Walk the entire zone wire looking for: corroded pierce-point connectors (especially IDC clip-style), wire insulation damage from stakes or spades, UV-cracked cable sections where conductors touch, and flooded direct-burial splices with green or black copper.
Count the wattage of every fixture on the fault zone. For LED fixtures, use VA = labeled watts ÷ power factor (use 0.7 if unknown). Sum all zone VAs and compare to the transformer's rated wattage. The safe operating limit is 80%. If total VA exceeds 80% of rated capacity, remove fixtures until the system is within limit. Do not confuse watts with VA — a 7W LED at 0.7 power factor draws 10 VA. This is the most common cause of repeated OL codes after fixture upgrades.
Replace the transformer if: fault persists with zero secondary load connected (Step 2 no path); the transformer is over 10 years old with escalating fault frequency; output voltage measures zero at the terminal block despite confirmed input power; or there is visible heat damage, melted plastic, or burning smell inside the cabinet. For replacement guidance see the transformer sizing guide, the transformer replacement guide, and the Hampton Bay replacement guide.
Universal vs Brand-Specific: Which Codes Mean the Same Thing Everywhere
One of the biggest sources of misdiagnosis in landscape lighting is assuming that a code or behavior seen on one brand means the same thing on a different brand. Some signals are genuinely universal — they mean the same thing regardless of who made the transformer. Others are brand-specific and can only be interpreted with that manufacturer's documentation.
Signals That Are Universal Across All Consumer Landscape Transformers
These fault behaviors have consistent meaning regardless of brand because they reflect the underlying electrical condition, not the manufacturer's software implementation:
- LED zone button flashing/blinking: Universally means that zone detected an overload or short circuit. Documented identically in the Hampton Bay HB-200 manual and consistent with Portfolio, Malibu, and generic transformer behavior. The blink IS the protection signal across all LED-indicator transformer designs.
- Reset button tripping (popping out): Universally means the internal circuit breaker detected a secondary overcurrent condition — overload or short circuit. This is a physical mechanism (bimetallic strip or thermal protector), not software, so it behaves identically across all brands that use it.
- Rapid clicking / relay cycling: Universally indicates a short circuit that is causing the protection to trip and attempt restart repeatedly. The relay is electromechanical — brand-agnostic behavior.
- OL on a digital display: "Overload" is a near-universal convention on landscape transformer LCD displays. Virtually every digital transformer that shows text uses OL for output limit exceeded.
- Zero output voltage with confirmed input power: Universally means internal failure — not a code, but a measurement that has one meaning regardless of brand.
Signals That Are Brand-Specific and Require the Manufacturer's Manual
These codes cannot be interpreted without knowing the specific model's documentation:
- E1 on Hampton Bay HB-200 Hubspace: Means photocell sensor fault on this specific smart transformer. On the Hampton Bay analog DIY-300PS — which has no display — E1 is not a possible indicator. The same "E1" designation on a different brand could mean something entirely different (temperature sensor fault, low voltage fault, etc.). Do not assume E1 means photocell on anything other than a confirmed HB-200 Hubspace.
- "E" on Portfolio transformers: Portfolio uses a single "E" (not E1, E2, etc.) to indicate a general output fault. This is a Portfolio-specific display convention. A competing brand's "E" code may have a different meaning — or the "E" may be the first letter of a multi-character code that the display is truncating.
- Er / Err on generic digital transformers: Near-universal for "error state" but the specific sub-cause (short circuit vs input voltage fault vs internal component fault) varies by model. For generic brands without a documented manual, treat Er as "general fault — run the diagnostic flow above."
- Beep patterns: Completely brand-specific. A single beep on one brand means "button acknowledged." On another it may mean "overload." On a third brand it may mean "schedule set." Never interpret beep count without the specific model's manual.
- Any multi-digit alphanumeric code (E2, E3, E4, F1, etc.): If your transformer displays a code not covered on this page, it almost certainly comes from a commercial-grade or specialty transformer (CAST, KICHLER pro, FX Luminaire, VISTA Pro) whose codes are specific to that product line. Consumer landscape transformers from Hampton Bay, Portfolio, and Malibu do not produce multi-digit E-series codes.
Overload vs Short Circuit: The Critical Distinction That Changes Your Repair
Every landscape transformer fault indicator — E code, OL, reset trip, flashing LED — is produced by one of two underlying causes: overload or short circuit. They look identical from the outside but require completely different repairs. Getting this distinction wrong means the fault returns after you "fix" it.
Total connected wattage (or VA) exceeds the transformer's rated output. Current draw is too high for sustained operation. Protection triggers after the transformer heats up.
How to identify it:- System works for several minutes then shuts down (thermal delay)
- Reset holds initially but trips again after lights run for a while
- Fault occurs with all zones energized but not immediately on a single zone
- Total fixture wattage (calculated as VA) exceeds 80% of transformer's rated capacity
- Reduce fixture count — remove fixtures from the most loaded zone
- Upgrade to a larger transformer
- Recalculate using VA (watts ÷ power factor) not just labeled watts
- See the load calculation guide
Two conductors make unintended electrical contact, creating near-zero resistance and extremely high current draw. Protection trips immediately — no thermal delay.
How to identify it:- System trips immediately on energizing — no delay
- Reset trips the instant a specific zone wire is connected, even with zero fixtures
- Clicking/rapid cycling from the moment the zone connects
- Fault isolated to one specific zone or wire section
- Inspect all splice connectors on the fault zone for corroded, water-filled, or misinstalled connections
- Look for wire insulation damage — a stake driven through the cable, a nick from a spade, UV-cracked insulation causing conductors to touch
- Replace non-listed (standard wire nut) splices with UL 486D direct-burial connectors — see the splice code requirements guide
- Test each fixture individually to find one with a shorted LED driver
What to Do After Clearing a Fault: The Correct Protocol
Clearing a fault indicator without following the right protocol is why the same fault returns within minutes, hours, or days. The post-fault steps matter as much as the initial diagnosis.
Step 1: Identify which fault type occurred (overload vs short — see above)
Do not proceed until you know which fault type you have. Pressing reset without this knowledge means you'll clear the indicator, the system will run briefly, then the fault returns.
Step 2: Fix the root cause — not just clear the code
For overload: physically remove fixtures or redistribute them to stay within 80% of the transformer's rated capacity. For short circuit: physically locate and repair the shorted connection. Do not just reset and hope — the fault will return, often within seconds to minutes.
Step 3: Verify the fix before full reconnection
With all secondary wires disconnected and the fault cause repaired, reconnect one zone at a time and hold for 5+ minutes before adding the next. A system that holds stable for 10–15 minutes across all zones has had the fault properly cleared. A system that holds for 2 minutes and then trips again has a remaining fault or was only partially fixed.
Step 4: Measure output voltage as final confirmation
After restoring normal operation, use a multimeter to verify output voltage at the farthest fixture on each zone — should read 10.8V minimum (fixture minimum) to 15V maximum. Voltage below 10.8V means excessive voltage drop that may be misread as a fault condition. See the voltage drop guide and the voltage drop calculator.
Replace vs Repair: When the Fault Means the Transformer Is Done
Most fault conditions in landscape lighting are system problems — the transformer is responding correctly to a problem in the fixtures or wiring. But some fault patterns indicate the transformer itself has reached end of life. Here's how to tell the difference.
The Fault Is in the System — Repair the System
- Fault clears when secondary zones are disconnected
- Fault is isolated to one specific zone or wire section
- Fault appeared after adding new fixtures or disturbing the wiring
- System is less than 8 years old and never had problems before
- Reset holds with no load, trips when a specific zone is reconnected
The Fault Is in the Transformer — Replace the Transformer
- Fault indicator (E code, flashing LED, reset trip) returns even with NO secondary load connected
- Zero output voltage measured at terminals even with the transformer in ON mode and confirmed outlet power
- Transformer is more than 10 years old and has had increasingly frequent issues
- Visible heat damage, melted components, or burning smell from inside the transformer cabinet
- Per the Hampton Bay troubleshooting documentation: "If the transformer shows zero voltage output even after you've checked the fuse, reset breakers, and confirmed input power, it indicates a major internal component failure."
For transformer replacement options, see the transformer sizing guide, the Hampton Bay replacement guide, the how to replace a landscape lighting transformer guide, and for Portfolio-specific replacements, the Portfolio transformer replacement guide.
Transformer Error Codes & Fault Indicators FAQ
What does E1 mean on a Hampton Bay landscape lighting transformer?
On the Hampton Bay HB-200 Hubspace smart transformer (model HB-200-1215WIFI), E1 indicates a photocell sensor fault — the dusk-to-dawn sensor has a wiring fault, a disconnected lead, or a failed component. The fix is to unplug the transformer, reseat the photocell connector firmly, clean the photocell lens, and reconnect. If E1 persists, the photocell needs replacement. Note: On older analog Hampton Bay transformers (DIY-300PS and similar), there is no alphanumeric display — faults are indicated by the LED flashing (overload or short circuit) or the reset button tripping. See the Hampton Bay error codes and manual guide for model-specific details.
My Portfolio transformer shows "E" on the display. What does it mean?
The "E" code on a Portfolio landscape lighting transformer means an output fault — overload (too many watts connected) or a short circuit in the secondary wiring. The transformer has shut down its output to protect itself. Unplug the transformer for 5 minutes, disconnect all secondary zone wires, plug back in, and reconnect zones one at a time. If E returns immediately when connecting a specific zone wire even with no fixtures attached, that zone has a short circuit in the wire. If E returns only after connecting fixtures and running for a few minutes, the system is overloaded. See the Portfolio transformer troubleshooting guide for the complete procedure.
Why is my landscape lighting transformer clicking on and off?
Rapid clicking from a landscape lighting transformer indicates the internal relay is rapidly cycling because a short circuit or severe overload is causing it to trip and reset repeatedly. Unplug the transformer immediately — prolonged clicking stresses the relay. Disconnect all secondary wires. Reconnect one zone at a time to isolate which zone contains the short. A shorted zone will cause clicking to return immediately upon connection. Look for corroded splice connectors, damaged wire insulation (conductors touching), or a fixture with a shorted LED driver. The Portfolio landscape lighting troubleshooting guide has the zone isolation procedure.
What does OL mean on a landscape lighting transformer display?
"OL" means Overload — the secondary circuit is drawing more current than the transformer can safely supply. This is not a short circuit code; OL indicates the total load is too high. The fix is to reduce connected fixture wattage to within 80% of the transformer's rated capacity. For LED fixtures, use VA (volt-amperes) not watts for accurate load calculation: VA = Fixture Watts ÷ Power Factor (typically 0.7 for LED landscape fixtures). A 7W LED fixture at 0.7 power factor draws 10 VA — significantly more than its labeled wattage suggests. See the load calculation and code compliance guide for the complete VA calculation procedure.
My transformer reset button keeps tripping. How many times can I press it?
There is no safe number — pressing reset repeatedly without fixing the root cause damages the transformer's internal protection circuit over time. More importantly, a system that keeps tripping the reset button has an active fault that is likely getting worse: a corroded splice building resistance, an overloaded zone, or a failing fixture driver. The reset button on landscape transformers is the NEC Article 411-designated secondary circuit overcurrent protection device — it exists to protect your wiring and fixtures, not to be bypassed by repeated pressing. Find the root cause using the overload vs short circuit diagnosis above, fix it, and the reset should hold. If the reset button trips on a system with no load connected at all, the transformer itself has failed and needs replacement. See the Portfolio transformer reset guide.
Related Troubleshooting and Repair Guides
- Portfolio Transformer Troubleshooting
- Portfolio Transformer Reset Guide
- Portfolio Transformer Not Working
- Portfolio Transformer Master Guide
- Hampton Bay Error Codes & Manual
- Hampton Bay Replacement Guide
- Malibu Transformer Manual
- Paradise Transformer Troubleshooting
- Transformer Sizing Guide
- Transformer Size Calculator
- How to Replace a Transformer
- How to Test a Transformer
- Load Calculation & Code Compliance
- Voltage Drop Guide
- Voltage Drop Calculator
- Arc Fault & GFCI Guide
- GFCI Requirements
- Splice Connection Code Requirements
- Failure Points Guide
- Photocell Not Working Guide
- Landscape Lighting Troubleshooting
- Portfolio Landscape Lights Not Working
- One Zone Not Working
- All Lights Out at Once